Architectural reference
What you’ll need
- An ngrok account.
- An MCP server process running on a local server, VM, or container.
- The ngrok agent installed directly on the machine (VM, server, or container) running your local MCP server.
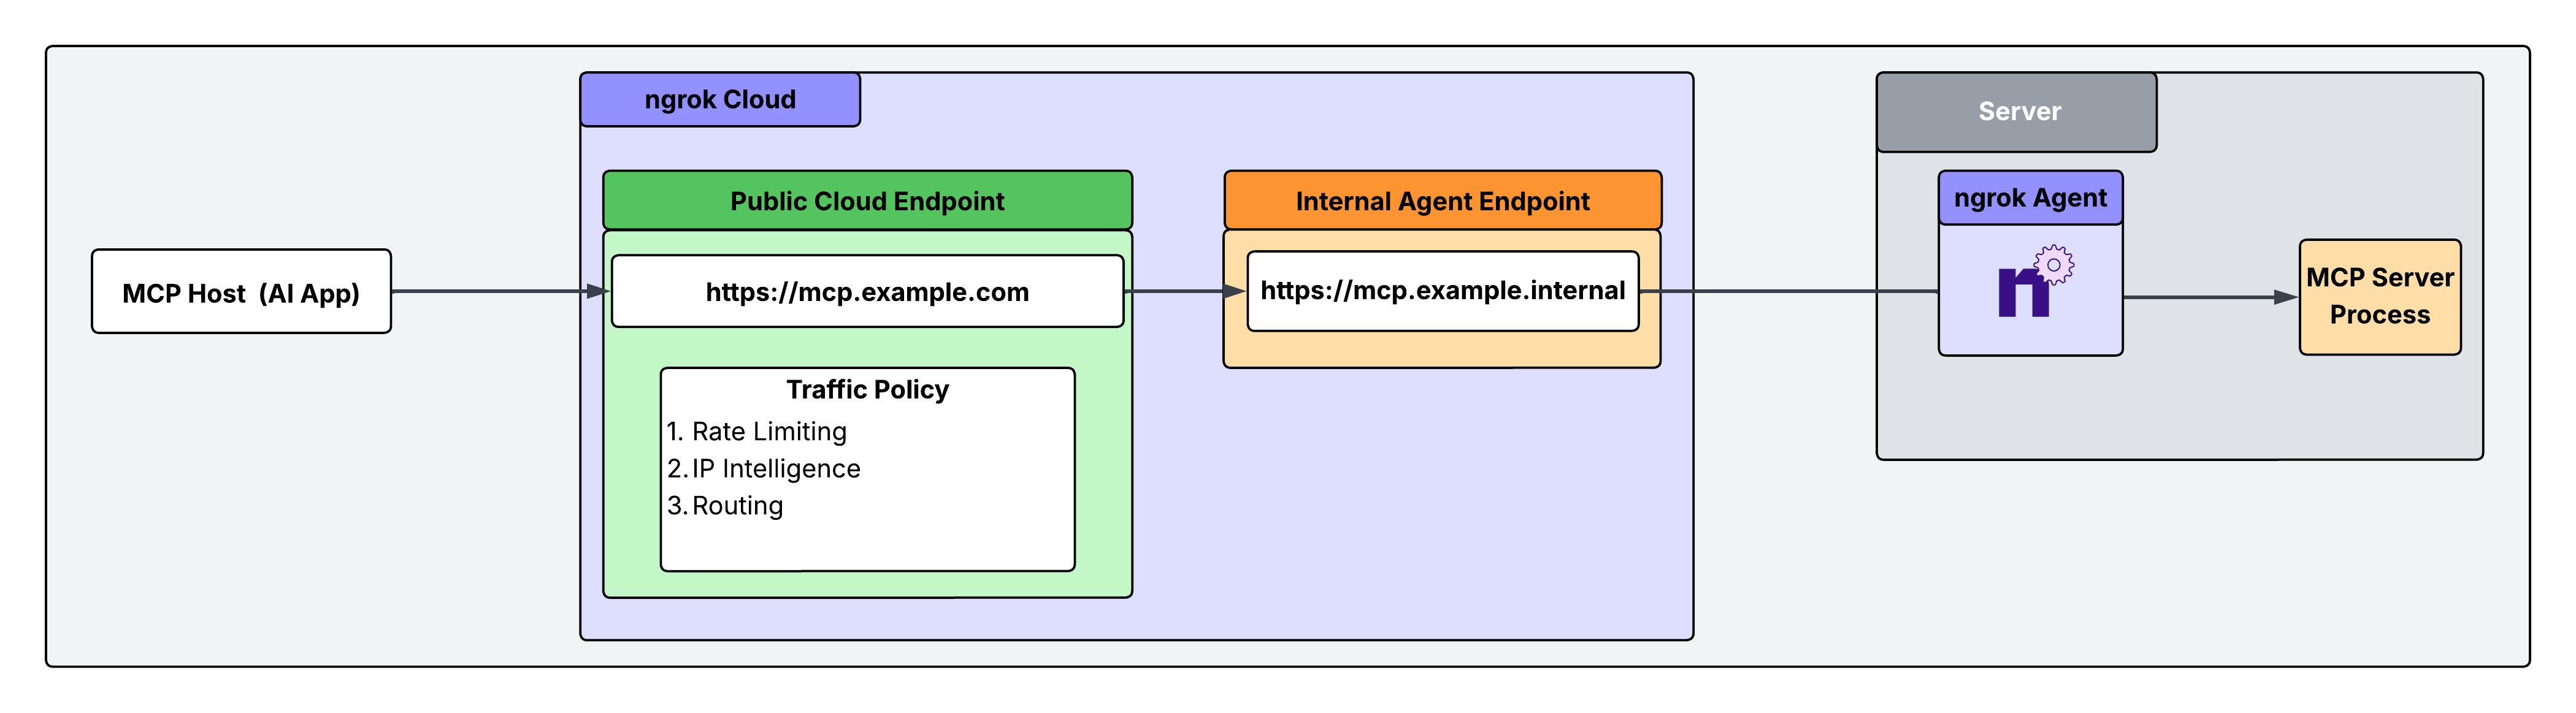
1. Install the ngrok Agent and configure internal Agent Endpoints
Configure the agent to declare an internal Agent Endpoint that points to the port running your MCP server process. This connects the server to your ngrok account, but nothing can connect to it until you complete the subsequent steps. Internal endpoints are private endpoints that only receive traffic when forwarded through the forward-internal Traffic Policy action. This allows you to route traffic to an application through ngrok without making it publicly addressable. Internal endpoint URL hostnames must end with.internal.
After installing the ngrok agent, define an internal endpoint inside the ngrok configuration file for the MCP server you want to make accessible from your AI tools.
You can install ngrok and its configuration file in /path/to/ngrok/ngrok.yml and the executable in /path/to/ngrok/ngrok.
2. Create a public Cloud Endpoint
Cloud Endpoints are persistent, always-on endpoints whose creation, deletion and configuration is managed centrally via the Dashboard or API. They exist permanently until they are explicitly deleted. Cloud Endpoints do not forward their traffic to an agent by default and instead only use their attached Traffic Policy to handle connections. Create a Cloud Endpoint for the MCP server you need to route traffic to. In your ngrok dashboard, go to Endpoints and click New. This Cloud Endpoint forwards traffic to the MCP server via the internal endpoint you created in step 1.3. Attach Traffic Policy to your Cloud Endpoint
Navigate to thehttps://mcp.example.com Cloud Endpoint and replace the default Traffic Policy with:
4. Test your MCP gateway
In your Claude configuration file where you’ve defined your MCP server, replace theurl field with your ngrok Cloud Endpoint and add an authorization header with your bearer token.
Ensure your ngrok agent and the internal Agent Endpoint are active.
Any prompt you send from Claude’s MCP host is routed through your ngrok MCP gateway endpoint.
Run these tests to verify it’s functioning correctly:
Remove the authtoken from the Claude desktop config.
The request should be blocked and return a 401 status code with a message saying Authorization required.
Curl the URL or POST to it directly.
The request should be blocked and return a 403 status code since it didn’t originate from an Anthropic source IP.
Send a prompt through Claude and ensure the Auth key is present in the Claude config.
The request should return the expected response.
Try using this prompt on your agent to verify your MCP gateway is routing traffic: 'What tools do you have available in your current MCP configuration?'
What’s next?
- To learn more, see the Traffic Policy documentation.
- Optimize your setup by placing ngrok’s AI Gateway in front of your inference providers for dynamic routing and failover.