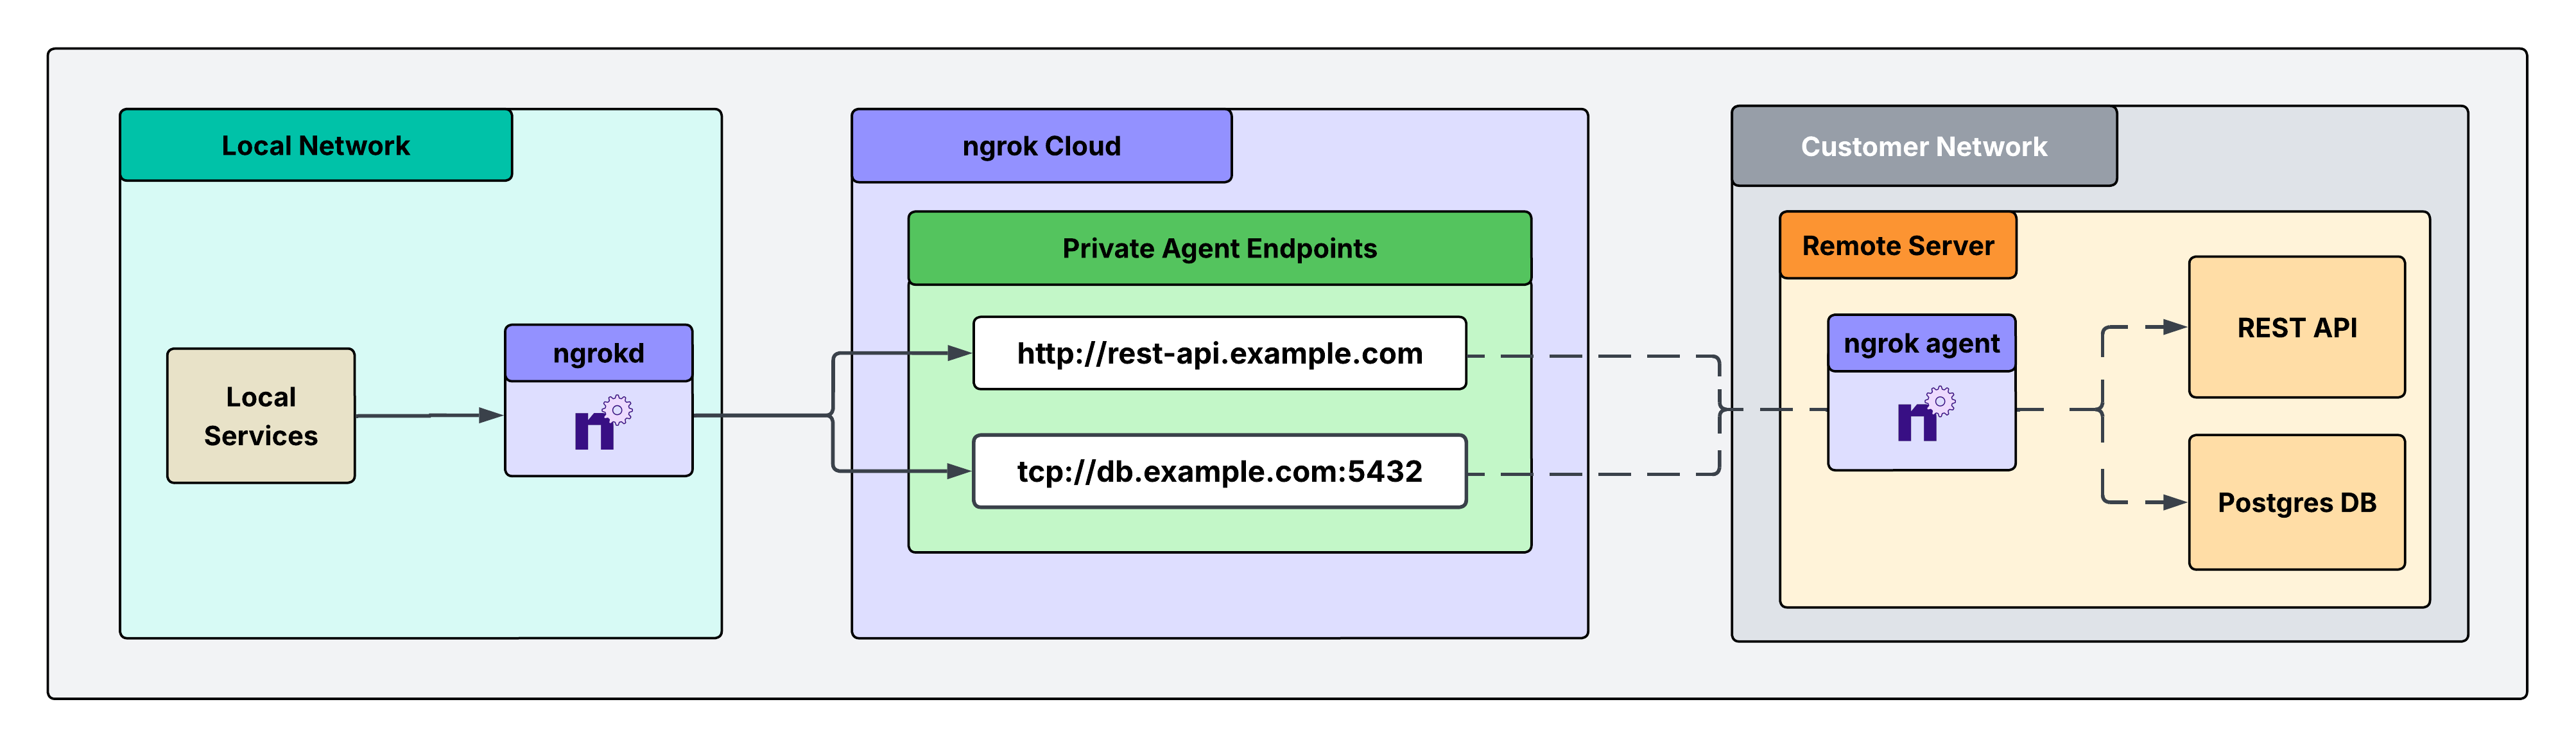
ngrokd: an ngrok component that enables a private, end-to-end solution for accessing remote services in a customer’s private network. This solution lets you securely access critical systems remotely without exposing them through public, authenticated endpoints. Instead, it leverages private endpoints that are only reachable from your local environment, eliminating your external attack surface while maintaining full access.
Architectural reference
What you’ll need
- An ngrok account. If you don’t have one, sign up.
- An ngrok API key. You’ll need an account first.
- An ngrok agent installed in a remote customer network. See the getting started guide for instructions on how to install the ngrok agent.
1. Install ngrokd in your local environment, start it, and set your API key
ngrokd is a lightweight daemon that makes your ngrok endpoints privately accessible and locked down to your local services. It automatically discovers your endpoints, assigns them local addresses, and forwards traffic through ngrok’s secure infrastructure, allowing your apps to reach remote services without any network configuration. Think of it as a local proxy that turns ngrok endpoints into services that feel like they’re running on your machine.
- Mac
- Linux
- Windows
- Docker
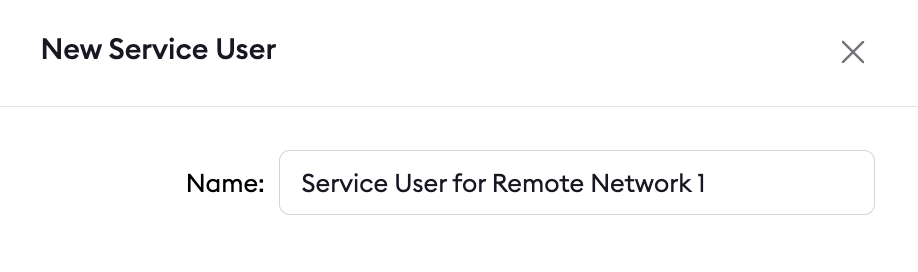
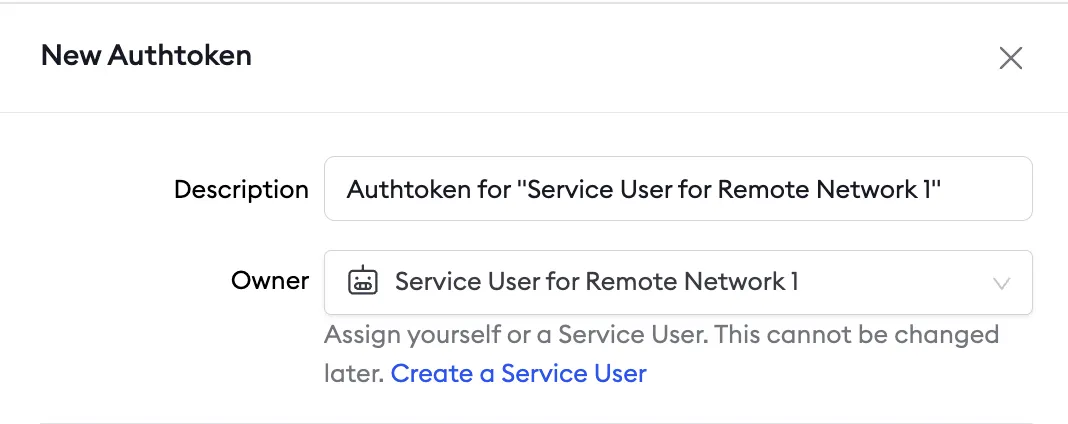
2. Create a service user and authtoken for isolated network access
Create a service user and an associated authtoken for each of your customers. A service user is intended for automated systems that programmatically interact with your ngrok account (other platforms sometimes call this concept a Service Account). Create a separate service user and associated authtoken for each customer so that:- Their usage of your ngrok account is isolated and scoped with a specific permission set
- If an agent is compromised, you can revoke its access independently
- Agent start/stop audit events are properly attributed to each customer
- Your ngrok agents don’t stop working if the human user who set them up leaves your ngrok account
3. Install the ngrok agent within your remote network and configure private Agent Endpoints in ngrok.yml
First, install the agent in the customer’s remote network, either on a gateway or directly on a device. Follow the getting started guide for installation instructions. Then, configure the agent to create private Agent Endpoints pointing to the services you want to remotely access. This connects the services to your ngrok account, and the configuration is shown in the example agent configuration file below. Private Agent Endpoints are private endpoints that can only receive traffic from services on your local network wherengrokd is installed.
These endpoints are not publicly addressable anywhere on the internet, and access is completely locked down to your local environment.
After installing the ngrok agent, define private Agent Endpoints for each service you want to remotely access inside the ngrok configuration file at /path/to/ngrok/ngrok.yml:
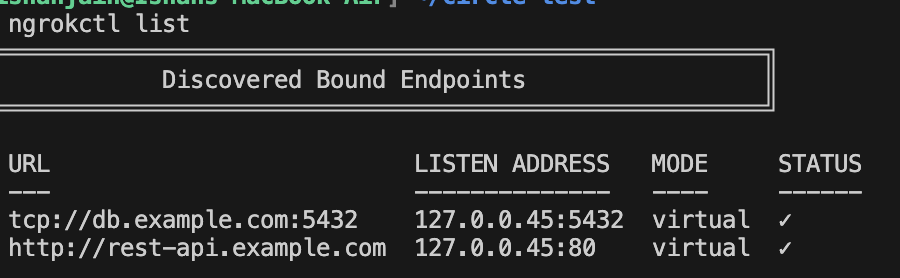
4. Test end-to-end connectivity from your local environment to upstream services
From the machine wherengrokd is running, run:
What’s next
- Install ngrok as a background service to ensure the agent starts on boot and recovers from failures.
- Eliminate single points of failure with redundant agents to achieve high availability.