Jan 12, 2023
Putting the ESP32 microcontroller on the Internet

The ESP32 and ESP8266 microcontrollers are powerful.
Using their built-in features, these microcontrollers can wirelessly operate robotics, motors, or sensors from simple web applications. However, if you decide you want to put your inventions on the Internet so you and your friends can securely use these creations, it can be difficult. This is the reason that many IoT developers have started using ngrok to put their ESP32 project on the Internet.
The ngrok tunneling software provides an easy way to create and control tunnels from a computer on one LAN that are accessible to computers on other LANs anywhere on the internet.
If you are already familiar with ESP32 programming, skip to the section about using ngrok called “Put your project on the Internet”
Getting started with your ESP32 and ngrok
Prerequisites
- ESP32 or ESP8266, any microcontroller that has a web page
- Arduino IDE
- ngrok and an authentication token
- computer to host ngrok
- Internet connection
- wireless network
Setting up your ESP32
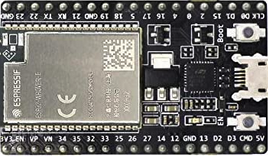
For this project, I am using a simple web server from the project below. I found this article easy to follow, and the source code was very clean; but, you can use any ESP32 program that creates a web server on your local network
https://randomnerdtutorials.com/esp32-web-server-arduino-ide/
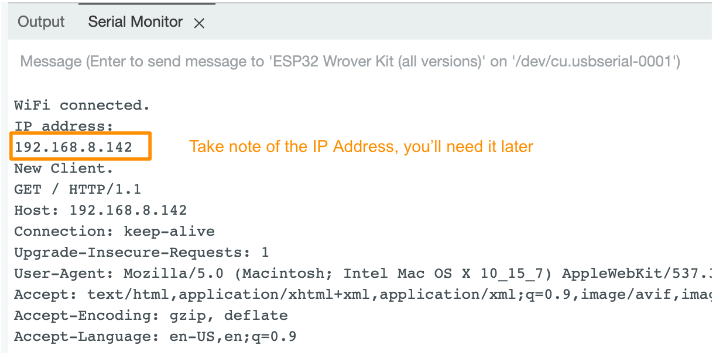
I loaded up the source code in Arduino IDE and deployed this project onto my ESP32. This source code displays the IP address of my ESP32 on the serial console.
Now, if everything worked correctly, I should be able to open a web browser, and view the web page from my local network.
Remember the IP address that your ESP32 is using.
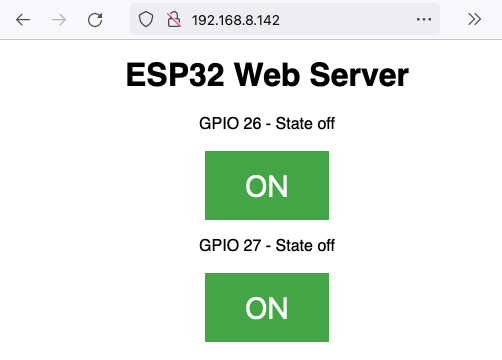
Now we have a web server serving a web page from our ESP32 microcontroller. Anyone on your local network can browse this web page and see this Magical creation.
Install and configure ngrok
- Signup for an ngrok account: https://dashboard.ngrok.com/signup
- Download ngrok: https://ngrok.com/download
- Install your Authtoken
To use ngrok, you do need to configure an Authtoken, so once you unzip your ngrok agent, we need to register this Agent with the ngrok Cloud.
Copy and paste the command from the ngrok Dashboard into your Terminal window, like shown below:
Put your project on the Internet
Before you can put your ESP32 on the Internet, you do need to know the IP address assigned to your ESP32. Earlier in the tutorial we noted where you can get the IP address from the Arduino IDE, or if you know how to get the IP address of your ESP32 from your Router, you need to do that now.
Run this command to put your ESP32 on the Internet.
On the free plan, you will get a randomly generated address every time you stop and restart ngrok. Your connection will stay active for several hours, and you can turn off the connection anytime by stopping the ngrok Agent.

Alternatively, upgrade to a paid plan and reserve a custom domain to get an easy-to-remember URL every time you start ngrok, with the --url flag:
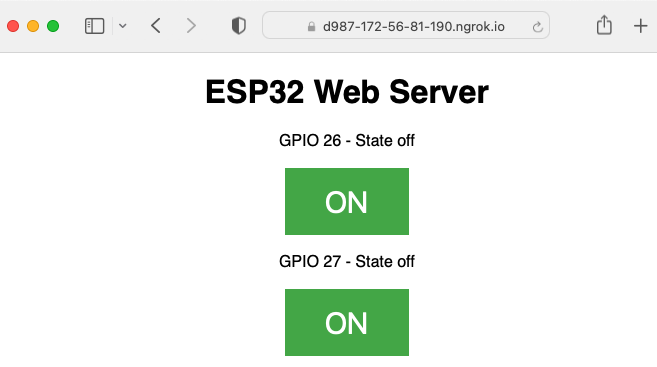
Congratulations! You can access your ESP32 from anywhere on the Internet using ngrok. If you see in your Terminal windows, the public address that anyone can use to see your project is shown below.
Below is a screenshot of my Macbook Pro connecting to ngrok and displaying my ESP32 project with a Free ngrok account.
Add authentication to your ESP32
Now you don’t want strangers turning on and off your devices. You should add some security. If you are new to authentication, you can use HTTP Basic Authentication to protect your ESP32 server with a single option:
For a more advanced option, you can use Google as an Identity Provider instead with a Traffic Policy OAuth rule:
Not only can ngrok tunnel the traffic, it can also do authentication for you. See Authentication with ngrok for the full range of options, from Basic Auth to OAuth to OpenID Connect.
Architecture
ngrok makes it possible to put any web application on the Internet, and a single ngrok Agent can run many projects at once. How many depends on your plan; check the pricing page for current limits. Here’s what it looks like in practice:
Next steps for ESP32 and security
As we build out our app and what we control with it, we’ll have to secure our system better and more reliably. Luckily, with ngrok we can add more components to protect ourselves and our systems. Beyond the Basic Auth and Google, in an enterprise environment, we could plug into our Identity Provider - such as Active Directory, Okta, or others - and layer on IP restrictions to block or allow IPs to refine access as we need.
Or what if we used ngrok without an agent?
Everything above runs the ngrok Agent on a computer that relays traffic to your ESP32. ngrok also publishes native SDKs for Go, Node.js, Python, and Rust that put a project on the Internet directly from your own code, no separate Agent process required.
Start with the Agent-based setup above to get your ESP32 project online today. If you later move the same idea into a full application on a more capable board, one of those SDKs puts it on the Internet without a separate Agent process at all.
Ready to put your own project online? Download ngrok and run through the steps above with your ESP32.
Related posts
How to access a Raspberry Pi remotely (without pesky port forwarding)
SSH into a Raspberry Pi from anywhere without port forwarding, a static IP, or a VPN. A step-by-step guide with ngrok that works behind NAT, CGNAT, and firewalls.
Five ways ngrokkers 'doglab' gateways for homelabs and side projects
How do they build gateways to route and authenticate traffic to blogs, OSS analytics services, photo-sharing apps, and much more with Traffic Policy?