Jul 11, 2023
Webhook Verification with ngrok Edges
•
1,043 words
•Jul 11, 2023
1,043 words
•In a previous blog post we covered how to verify PagerDuty webhooks using the ngrok agent. Just by sending a couple arguments with the `ngrok` command you can assert that the webhooks your application is receiving are being sent from the expected source. And if they fail verification, they’re dropped long before reaching your app.
However, one of the tradeoffs of using the ngrok agent is that all of your settings are ephemeral, or temporary. They only last as long as your ngrok session. Each time you fire up ngrok you’ll need to remember all the different arguments for setting up webhook verification and your credentials are captured in your command line history. Rather than repeat yourself each time you can set up a more permanent solution with an ngrok Cloud Edge in the ngrok Dashboard.
ngrok Cloud Edges are modules that allow you to secure, protect, or manipulate the traffic going to your service. You can configure OAuth, restrict inbound traffic by IP range, and set up webhook verification, just to name a few. Their true value comes from pre-configuring a selection of modules and then starting a tunnel with that same configuration every time.
In this blog post we’re going to set up webhook verification as a Cloud Edge to make things more permanent. For the sake of continuity with the previous blog post we’re going to continue working with PagerDuty webhooks. Keep in mind that these instructions can relate to any webhook verification integration.
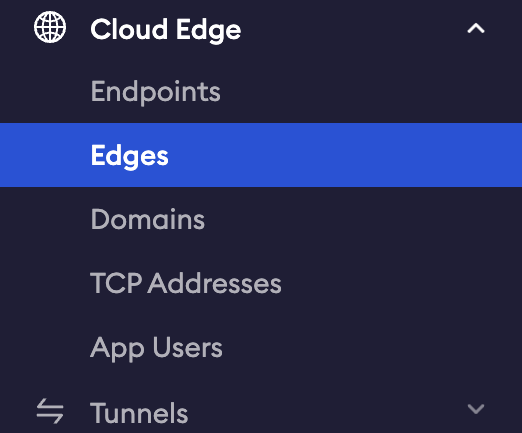
Let’s start by logging in to the ngrok Dashboard and going to the Edges area. You can find the Edges link in the Cloud Edge section of the dashboard side menu.
On the Edges page you’ll see a list of your configured Edges and an option to create a new Edge. To create a new Edge click the blue New Edge button on the right.
The New Edge window will show options to create one of three different types of Edges–HTTPS, TCP, and TLS.
HTTPS – connect web servers to the world and easily add OAuth or manipulate traffic headers.
TCP – connect services using a TCP-based protocol such as SSH, RDP, or databases.
TLS – run production services with end-to-end encryption that no one (not even ngrok) can see.
For our purposes today we’ll select the default option for creating a HTTPS Edge.
The default HTTPS Edge gives us an Endpoint with a unique URL and the option to configure a variety of modules. First, give the Edge a name, so you can find it later. In this case, I’ll use, “PD Webhook Verify.”
Scrolling down you’ll see Endpoints. Creating the Edge generates a unique URL for your Endpoint, but you can also add your own custom domains as an endpoint. We’ll look at custom domains later on. For now, we’ll stick with the default value.
Next, you’ll find Routes. This is where you can set up different combinations of modules for different routes in your app. We’ll keep it simple and not change this for now .
The large area below Routes is the Modules section. This is where you’ll add and configure your webhook verification. You’ll find that link at the bottom of the menu.
In the Webhook Verification area choose to Begin Setup, and then select PagerDuty as the Webhook Provider.
With PagerDuty selected you’re given a field to insert the Webhook Secret you received from PagerDuty. Paste the same secret we were using on the command line in that post and click the Save button in the upper right of the page. Now we’ll connect your domain to this Edge.
To connect your domain go to the Domains section of the Cloud Edge menu and click on the New Domain button. Type the domain you’ve been using with your webhook. Since the domain you used before worked with ngrok in the command line, the domain should still be available. In my case `my-super-rad-domain.ngrok.app` was available! So, it won’t be for you. Feel free to choose an equally awesome domain name for your Edge.
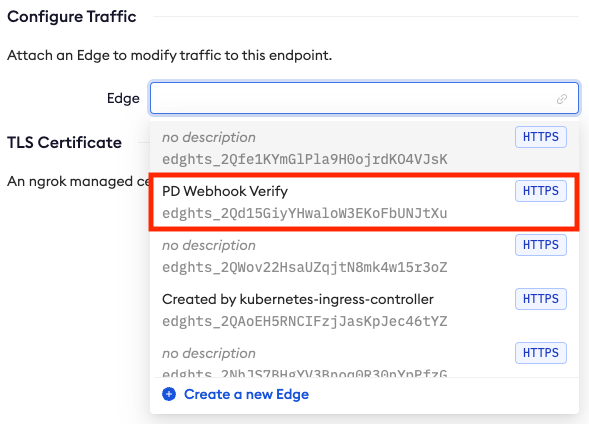
With your Domain selected you will then choose to attach it to your Edge. Remember, ours is called, “PD Webhook Verify.” Notice how easy it is to find your Edge when you give it a good name, as seen below.
Once the domain is connected to your Edge you’ll find it listed in the Endpoints section of your Edge, like so.
Our Edge is now configured to verify PagerDuty webhooks, and it’s set to accept traffic on our custom domain. All we need to do now is get it online. We do that by starting a Tunnel.
Tunnels are started in the command line with the `ngrok tunnel` command while passing the Edge ID. The easiest way to do this is to go back to the “PD Webhook Verify” Edge we just created and click the Start a Tunnel button. This will give you the full command to run to start a tunnel pointed at your edge. The command should look like this:
ngrok tunnel --label edge=edghts_2Qd15Gn0tReDacT3DKoFbUNJtXu http://localhost:3000The output for the tunnel command will look similar to the regular `ngrok http` display, with one major difference on the `Forwarding` line. There you’ll see something like:
Instead of showing the domain that is receiving the traffic, like when you run `ngrok http`, you’re shown the Edge that is receiving the traffic. The domain for that edge is any of the values set in the Endpoints section back in the dashboard.
As long as the tunnel you started remains running all the requests made to your endpoint will be verified before being accepted.
Webhook verification is only one of several Cloud Edges that are available in the ngrok Dashboard. Among other things, with Edges you can configure OAuth, restrict traffic to a specific range of IPs, or allow ngrok to terminate TLS traffic.
Let us know how you’re using Edges! If you have any questions or super cool use cases please share them with us over in the ngrok Slack Community. And, for more information on webhook security check out Webhooks.fyi.