Mar 8, 2022
Automating Remote Systems with ngrok and Zapier
•
853 words
•Mar 8, 2022
853 words
•Automation brings me joy, especially when I get rid of menial, repetitive tasks like filling spreadsheets, reacting to events, or grabbing status updates. With modern automation solutions — a.k.a. Integration Platform as a Services (iPaaS) — like Zapier, I can connect it once and never think about it again.
However, iPaaS solutions are designed primarily to interact with publicly available cloud-based systems, not systems deep inside an organization or on my local machine. In this tutorial, We will connect Zapier to remote APIs using ngrok to bridge the gap ;)
Tip: This tutorial can be applied to any iPaaS solution that supports REST API calls, including Workato, Tray.io, IFTTT, and much more 🎉 🎉 🎉.
For this post, I decided to use a sample scenario for our integration: gather employee's badge information from a remote API (not accessible from the internet) to Google Sheet:
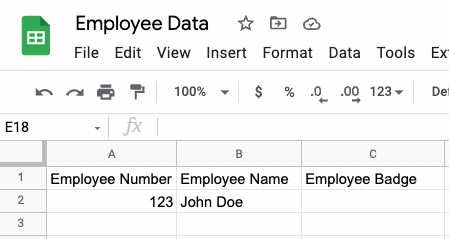
For every employee added to Google Sheet (columns A and B), we need to fill column C with their badge number. Our sample remote API provides the badge numbers that we will present to Zapier with ngrok.
To get the sample app running, clone the repo app, install the dependencies, and launch the app:
1git clone https://github.com/ngrok/ngrok-ipaas-example.git2cd ngrok-ipaas-example3npm install4npm run appTo confirm the app is running, go to http://localhost:3000/employeeLookup?employeeNumber=123. You will see a message like this:
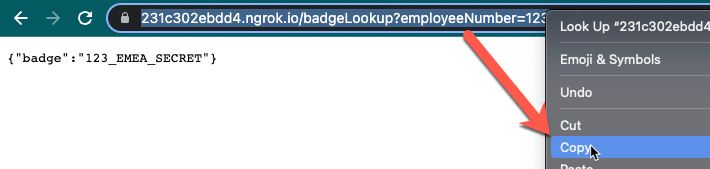
{ "badge": "123_EMEA_CONFIDENTIAL" }After sign up, copy your authtoken.
Install the ngrok agent.
Enter ngrok --authtoken=<your_authtoken> to associate the authtoken with your account.
Launch ngrok with the command: ngrok http 3000
ngrok will display a url.
Copy the new ngrok.io url into your browser. (for example http://ThisPartWillChange.ngrok.io/employeeLookup?employeeNumber=123).
You should see a message like this:

Because we don't want bad actors using our employee badge lookup, we'll add HTTP Basic Authentication to our connection:
Return to the terminal with ngrok.
Enter ctrl+c to quit the process.
Launch ngrok with basic authentication (replace userId and password with strong credentials): ngrok http 3000 --basic-auth=userId:password
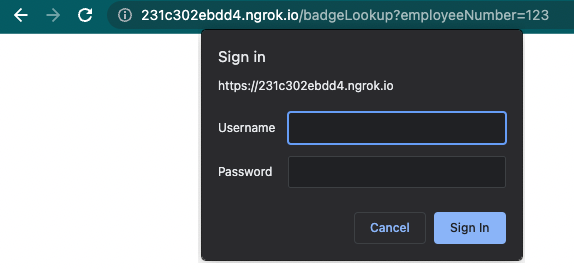
Copy the random url and open it with your full API path (for example http://33e23ede.ngrok.io/employeeLookup?employeeNumber=123).
You will be prompted for a login (enter the credentials you added to the previous command).
Note: HTTP Basic Authentication is one of the many controls you can use to restrict access to your APIs. You can also limit access only to the Zapier IPs with IP restrictions. ngrok also offers other security mechanisms like Mutual TLS for even stronger security and permanent urls (so you don't need to copy the URL every time you launch ngrok).
Now that we have our app running and available via ngrok, it's time to connect Google and Zapier.
Go to sheets.google.com
After sign-in, create a Spreadsheet as follows:
Login into (or create) your Zapier account
Go to our sample template in Zapier
Click Try this Zap
In the first action, follow Zapier instructions to connect your google account and select the Employee Data sheet.
Click Continue.
Click Test Action and Retest & Review.
You will see the data retrieved by your API via ngrok (aka the magic moment!):
Click test action.
Confirm that you received a success message.
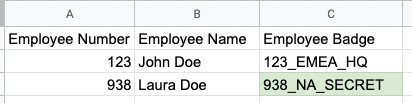
Back on Google Sheets, confirm that your row is updated with the data retrieved from ngrok:
Go to Google sheet and add a new employee record.
After a few minutes (up to 15 minutes on the free Zapier plan), the Employee Badge column should get filled automagically by your ngrok-connected service:
Once you get your automation going, you can implement additional features to make your flow more robust. Here are some suggestions: