ngrok Secure Tunnels provides a simple and effective way for enabling remote access to systems. With a simple command— i.e. ngrok http 80 — you can share your apps, APIs, and systems with the world, without complex network configuration, reliability issues, and NAT rules.
However, with power comes great responsibility: we need to ensure that we can limit who can get access to our systems. We can do that in seconds with the ngrok --oauth command.
Adding Authentication to your Tunnels
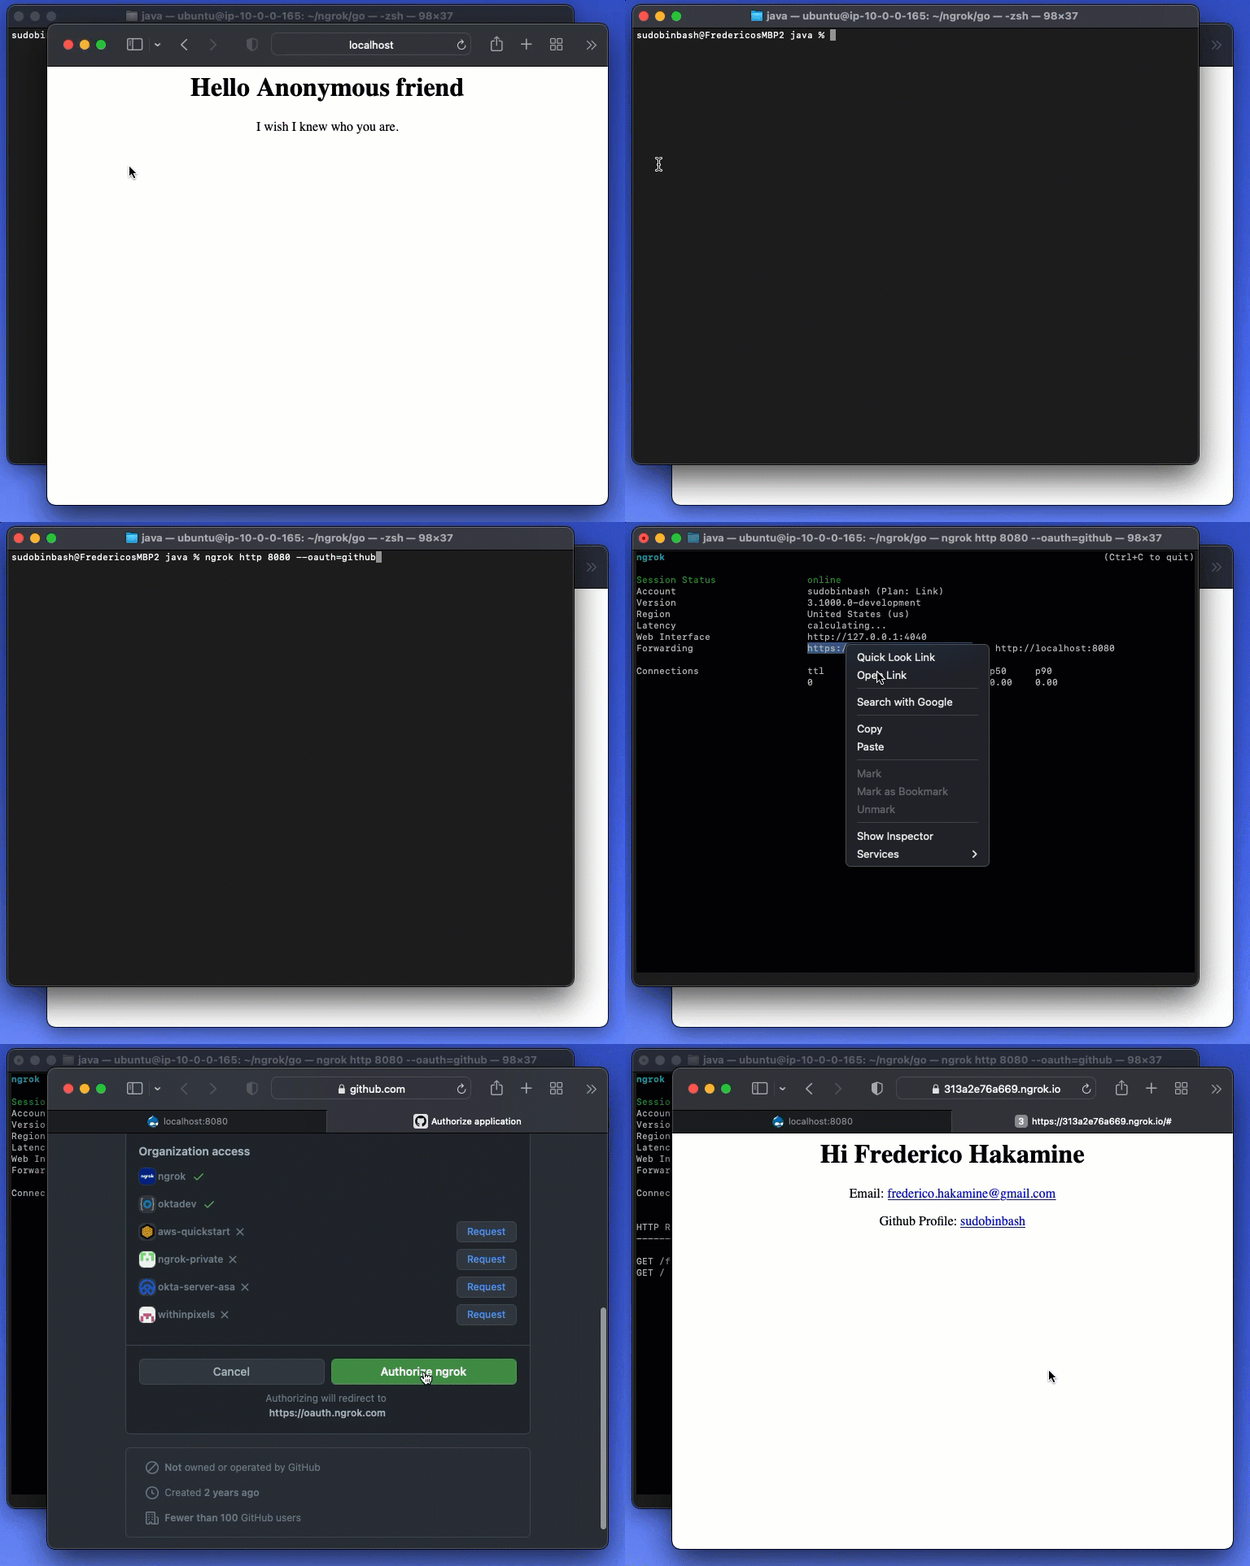
To secure a tunnel with OAuth 2.0, simply add --oauth=<your provider> to your tunnel.
For example:
ngrok http 80 --oauth=githubAs soon as you add the OAuth variable, only users logged can access your tunnel:

Fig 1. ngrok ingress with OAuth
Out of the box, ngrok supports OAuth tunnels with major providers such as Google, Github, and Microsoft. It also supports any solution compatible with OAuth, OpenID Connect, and SAML — such as Okta, Auth0, and dozens of other Identity Providers.
Authorizing requests
Once you have a secure tunnel, you will likely want to restrict access only to specific domains or even individual users.
We can do this with the --oauth-allow option.
In this example, we allow only access to people with the email domains acme.com and doe.com:
ngrok http 8080 --oauth=google \
--oauth-allow-domain=acme.com,doe.com
And with this example, we restrict access only to john@acme.com and jane@doe.com:
ngrok http 8080 --oauth=google \
--oauth-allow-email=john@acme.com,jane@doe.com
What's next?
Other security controls
In addition to OAuth 2.0, ngrok provides other access controls — webhook validations, basic authentication, IP restrictions, and Mutual TLS — to layer security controls for the network, agent, and encryption. Depending on your needs, your combination is likely to be different. For example, in many IoT use cases, you don't have a user for OAuth but probably want to limit the network with IP restrictions and limit the devices with mutual TLS. Alternatively, for accepting webhooks, you may use webhook verification while ignoring IP restrictions. The goal is to allow you to mix and match the policies you need to layer your security for your use case and requirements.
We'll explore configuring policies with additional controls in later posts but in the meantime, you can learn more about these controls by exploring our docs for IP Policies, and Mutual TLS encryption.