Frontegg SSO (OpenID Connect)
To secure access to ngrok with Frontegg Single Sign-On (SSO) using OpenID Connect:
This article details how to configure Frontegg as the primary Identity Provider (IDP) for ngrok endpoints. By integrating Frontegg SSO with ngrok, you can:
- Restrict access to ngrok endpoints only to users authenticated via Frontegg
- Use Frontegg security policies and MFA authenticators.
- Use Frontegg's Dashboard to facilitate access to ngrok apps.
Supported Features
The ngrok integration with Frontegg supports:
- SP-Initiated SSO: In this mode, users access ngrok endpoints and are redirected to Frontegg for authentication.
Requirements
To configure an ngrok edge with Frontegg, you must have:
- A Frontegg account with administrative rights to create apps
- An ngrok Enterprise Account with an authtoken or admin access to configure edges with OpenID Connect.
Configuration Steps
To integrate ngrok with Frontegg SSO, you will need to:
- Configure Frontegg with the ngrok app
- Configure ngrok with the SSO settings provided by Frontegg
Step 1: Configure Frontegg
Add the ngrok App in Frontegg
-
Access the Frontegg Portal, and sign in using your Frontegg administrator account.
-
On the left menu, click the environment you want to integrate with ngrok. In this example click the Development environment.
-
On the left menu, click Authentication, click Login method, enter the URL
https://idp.ngrok.com/oauth2/callbackunder the Hosted login field, and then click Save.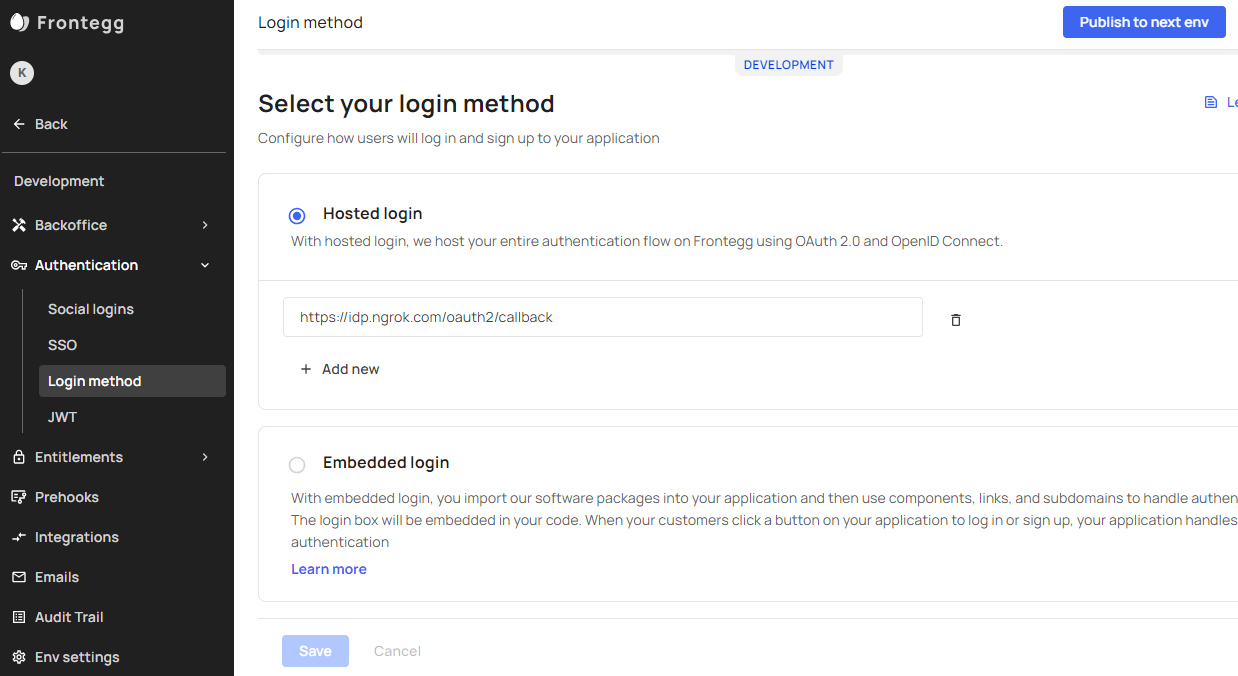
-
On the left menu, click Env settings, and copy the value of both the Client ID and the API key fields.
-
Click the Domains tab, and copy the value of the Domain name.
Grant access to Frontegg users
Create a Frontegg user:
-
On the left menu of the Frontegg Portal, click your environment, click Backoffice, click Accounts, and then click Add New.
-
On the Add new account popup, enter a name for the account,
ngrok.comin the Domain field, and then click Save. -
On the left menu, click Backoffice, click Users, and then click Add New.
-
On the Add new user popup, enter a name, email, select the account you have created, and then click Save. Note: by default, the user is assigned the Admin role.
Step 2: Configure ngrok
ngrok can leverage Frontegg SSO in two ways:
- From the ngrok CLI (using the
--oidcparameter) - From the ngrok dashboard
Option 1: ngrok CLI
Note: For this tutorial, we assume you have an app running locally (i.e., on localhost:3000) with the ngrok client installed.
-
Launch a terminal
-
Enter the following command to launch an ngrok tunnel with Frontegg SSO:
ngrok http 3000 --oidc=FRONTEGG_OAUTH_URL \
--oidc-client-id=FRONTEGG_CLIENT_ID \
--oidc-client-secret=FRONTEGG_CLIENT_SECRET \Note: Replace the following with the values:
- FRONTEGG_OAUTH_URL: Your Frontegg Domain name URL (i.e.
https://app-123456.frontegg.com). - FRONTEGG_CLIENT_ID: The client id you copied from Frontegg.
- FRONTEGG_CLIENT_SECRET: The API key you copied from Frontegg.
Alternatively, add the
--domain YOUR_DOMAINargument to get your custom URL, replacingYOUR_DOMAINwith your URL of preference. - FRONTEGG_OAUTH_URL: Your Frontegg Domain name URL (i.e.
-
Copy the URL available next to Forwarding (for example,
https://frontegg-sso-test.ngrok.app). -
Skip to Step 3
Option 2: ngrok Edge
To configure an edge with Frontegg:
-
Access the ngrok Dashboard and sign in using your ngrok account.
-
On the left menu, click Cloud Edge and then click Edges.
-
If you don't have an edge already set to add Frontegg SSO, create a test edge:
- Click + New Edge.
- Click Create HTTPS Edge.
- Click the pencil icon next to "no description", enter
Frontegg SSO OIDCas the edge name and click Save.
-
On the edge settings menu, click OIDC.
-
Click Begin setup and enter the following values into the fields:
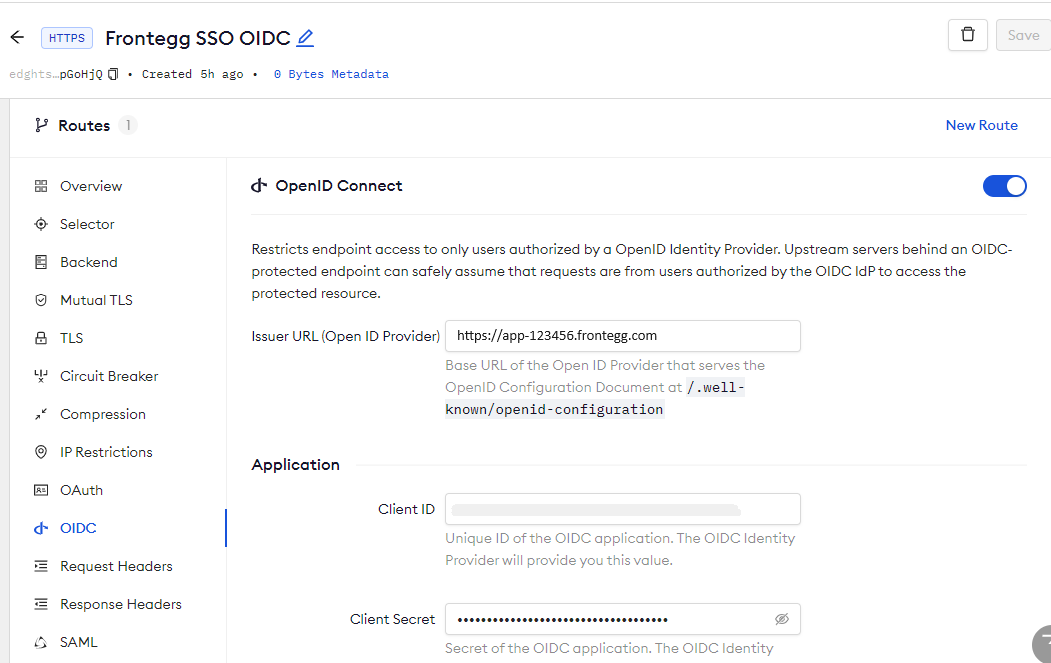
- Issuer URL: Your Frontegg Domain name URL (i.e.
https://app-123456.frontegg.com). - Client ID: The client id you copied from Frontegg.
- Client Secret: The API key you copied from Frontegg.
- Issuer URL: Your Frontegg Domain name URL (i.e.
-
Click Save at the top, and then click the left arrow to go back to the Edges page.
-
Launch a tunnel connected to your Frontegg edge:
For this step, we assume you have an app running locally (i.e. on localhost:3000) with the ngrok client installed.
-
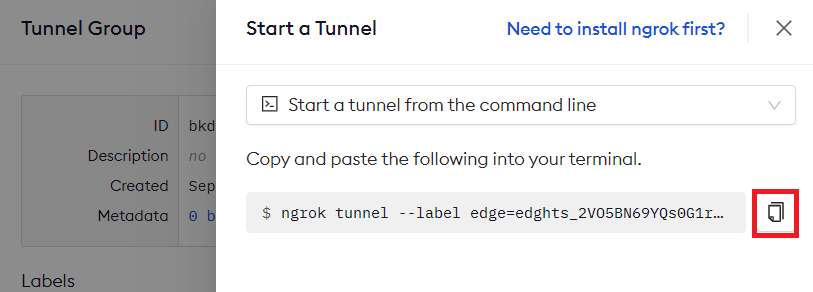
Click Start a tunnel.
-
Click the copy icon next to the tunnel command.
-
Launch a tunnel:
- Launch a terminal.
- Paste the command but replace
http://localhost:80with your localhost app address (i.e.,http://localhost:3000). - Click Enter and an ngrok tunnel associated with your edge configuration will launch.
-
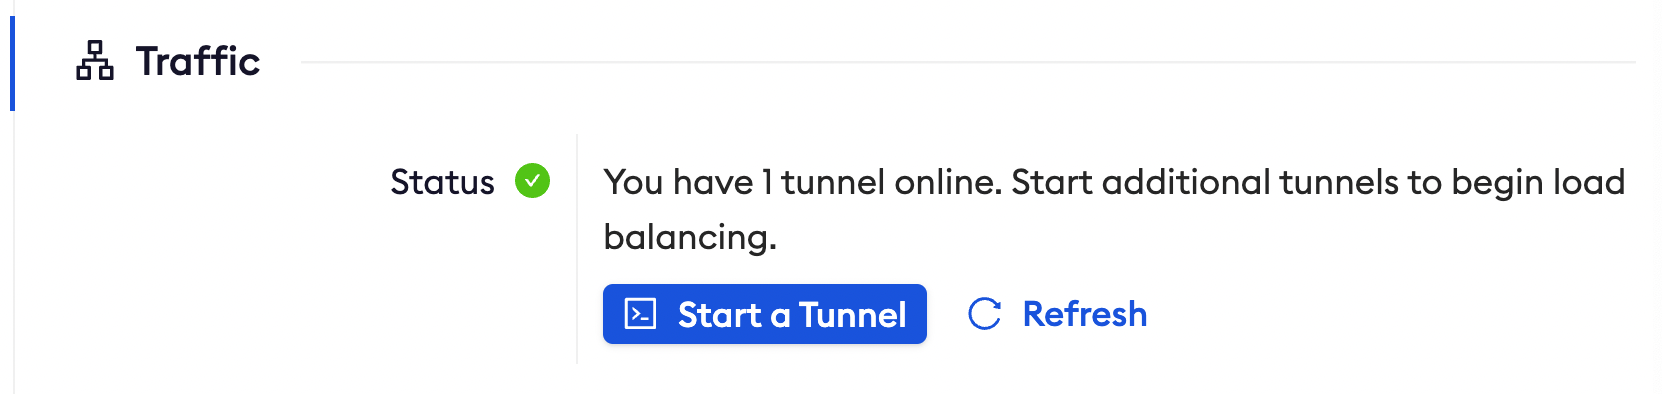
To confirm that the tunnel is connected to your edge:
- Return to the ngrok dashboard
- Close the Start a tunnel and the Tunnel group tabs
- Refresh the test edge page. Under traffic, you will see the message You have 1 tunnel online. Start additional tunnels to begin load balancing.
-
In the test edge, copy the endpoint URL (you use this URL to test the Frontegg Authentication).
Step 3: Test the integration
-
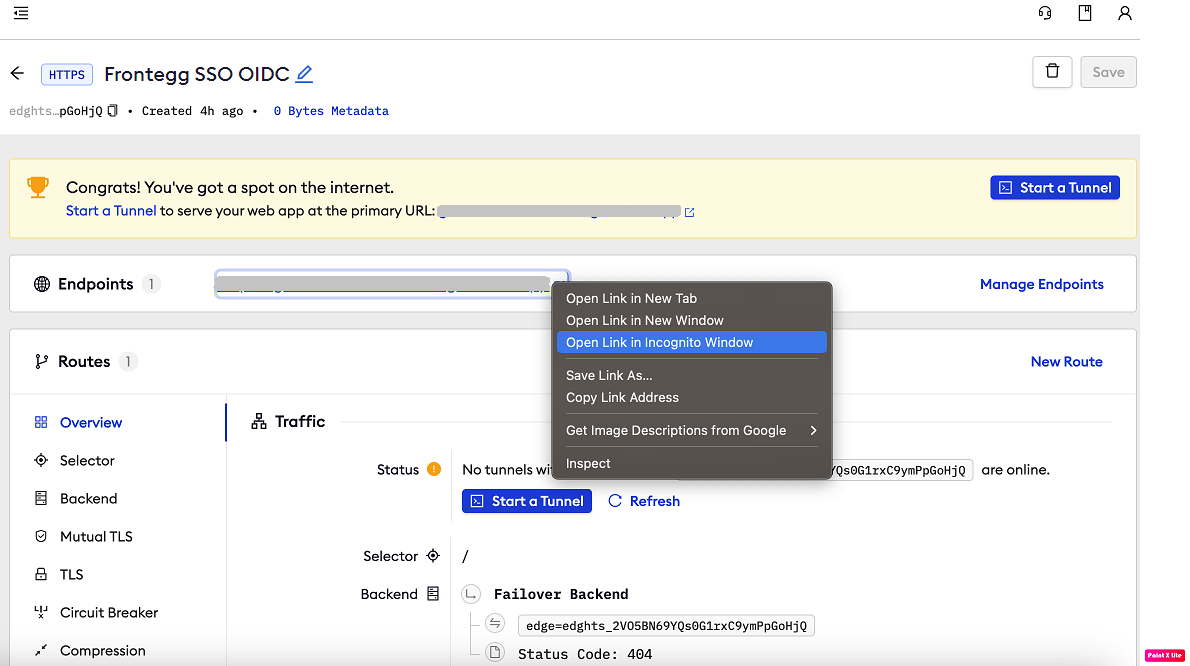
In your browser, launch an incognito window.
-
Access your ngrok tunnel (i.e.,
https://frontegg-sso-test.ngrok.app). Use the copied endpoint URL. -
You should be prompted to log in with your Frontegg credentials.
-
After logging in, you should be able to see your web app.