Ingress to Kubernetes apps managed by Rafay
In this guide, you'll launch a new cluster with Rafay and provision the ngrok Kubernetes Operator to route public traffic directly to a demo app through a secure tunnel.
In the end, you'll have learned enough to deploy your next production-ready Kubernetes app with Rafay, with the ngrok Kubernetes Operator giving you access to additional features, like observability and resiliency, with no extra configuration complexity.
Here is what you'll be building with:
- The ngrok Kubernetes Operator: ngrok's official controller for adding secure public and middleware execution to your Kubernetes apps with ngrok's cloud service. With ngrok, you can manage and secure app traffic at every stage of the development lifecycle while benefiting from simpler configurations, security, and edge acceleration.
- Rafay: A SaaS-based cloud controller that helps platform and DevOps teams manage their Kubernetes clusters and cloud environments. By plugging into existing Internal Developer Programs and CI/CD pipelines, Rafay helps enable more automation, consistency, and governance while also letting internal developers provision and deploy with ease.
What you'll need
- An account with Rafay.
- An account with the necessary privileges to create a cluster on one of the following managed Kubernetes services:
- Amazon Elastic Kubernetes Service (EKS)
- Azure Kubernetes Service (AKS)
- Google Kubernetes Engine (GKE)
- or a data center/edge or private cloud where you can deploy an upstream Kubernetes cluster.
- (optional) Rafay's RCTL utility installed and initialized on your local workstation.
- An ngrok account.
- kubectl and Helm 3.0.0+ installed on your local workstation.
- A reserved domain, which you can get in the ngrok
dashboard or with the ngrok
API.
- You can choose from an ngrok subdomain or bring your own custom branded
domain, like
https://api.example.com. - We'll refer to this domain as
<NGROK_DOMAIN>.
- You can choose from an ngrok subdomain or bring your own custom branded
domain, like
Create a new cluster with Rafay
We won't detail the steps to deploying a cluster with Rafay. For more information, find the getting started guide for your Kubernetes service, then click Cluster Lifecycle Management, which points you to the steps required to create and manage a new cluster with Rafay.
To prepare your cluster for the ngrok Kubernetes Operator and an app you'd like to make publicly accessible via a secure tunnel, you only need to finish the Provision part of Rafay's provider-specific getting started docs.
Prepare your cluster for the ngrok Kubernetes Operator
Before you create a Rafay blueprint for ingress managed by ngrok, you need to prepare your infrastructure in a way that works with Rafay's blueprints.
-
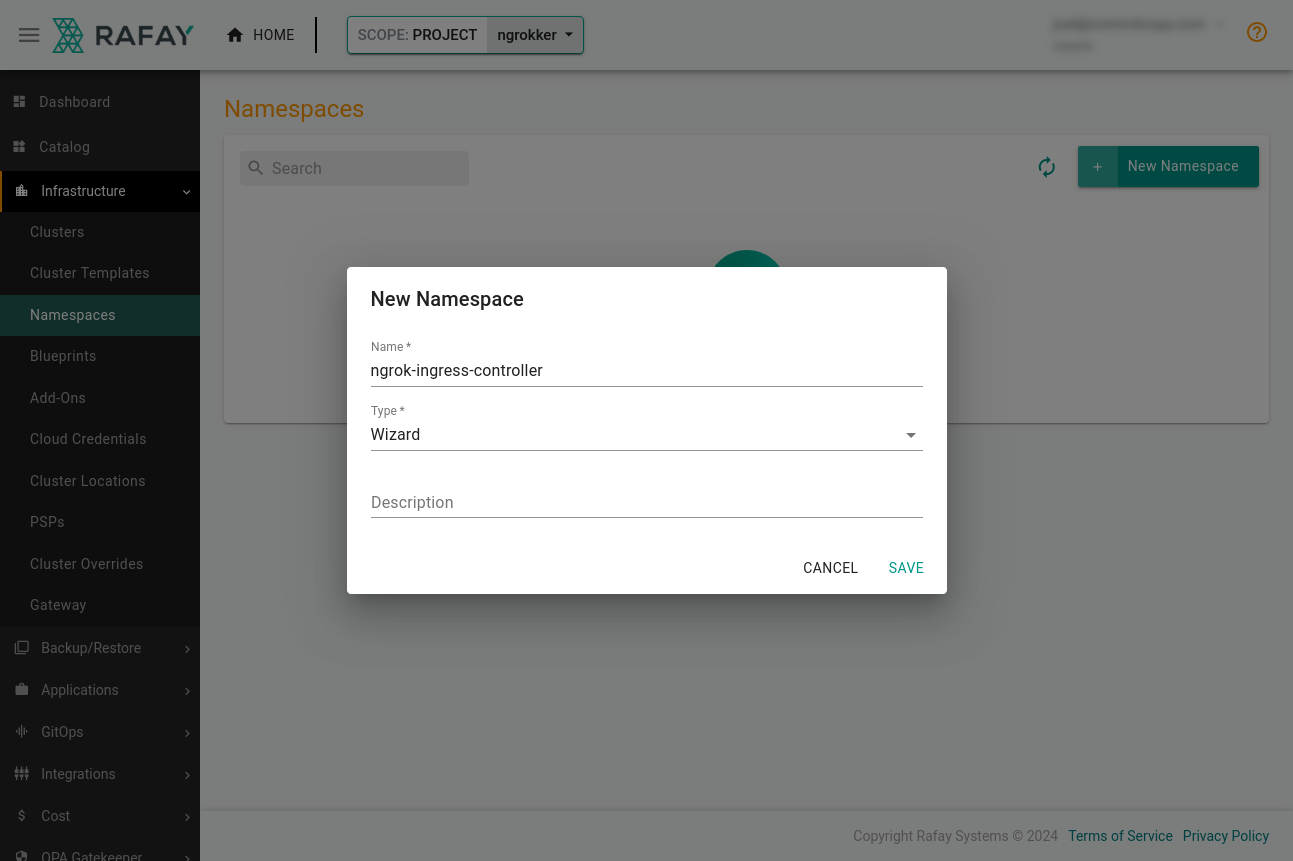
In Rafay, create a namespace by clicking Infrastructure→Namespaces, then New Namespace. Enter ngrok-operator and under Type, select Wizard. Finally, click Save.
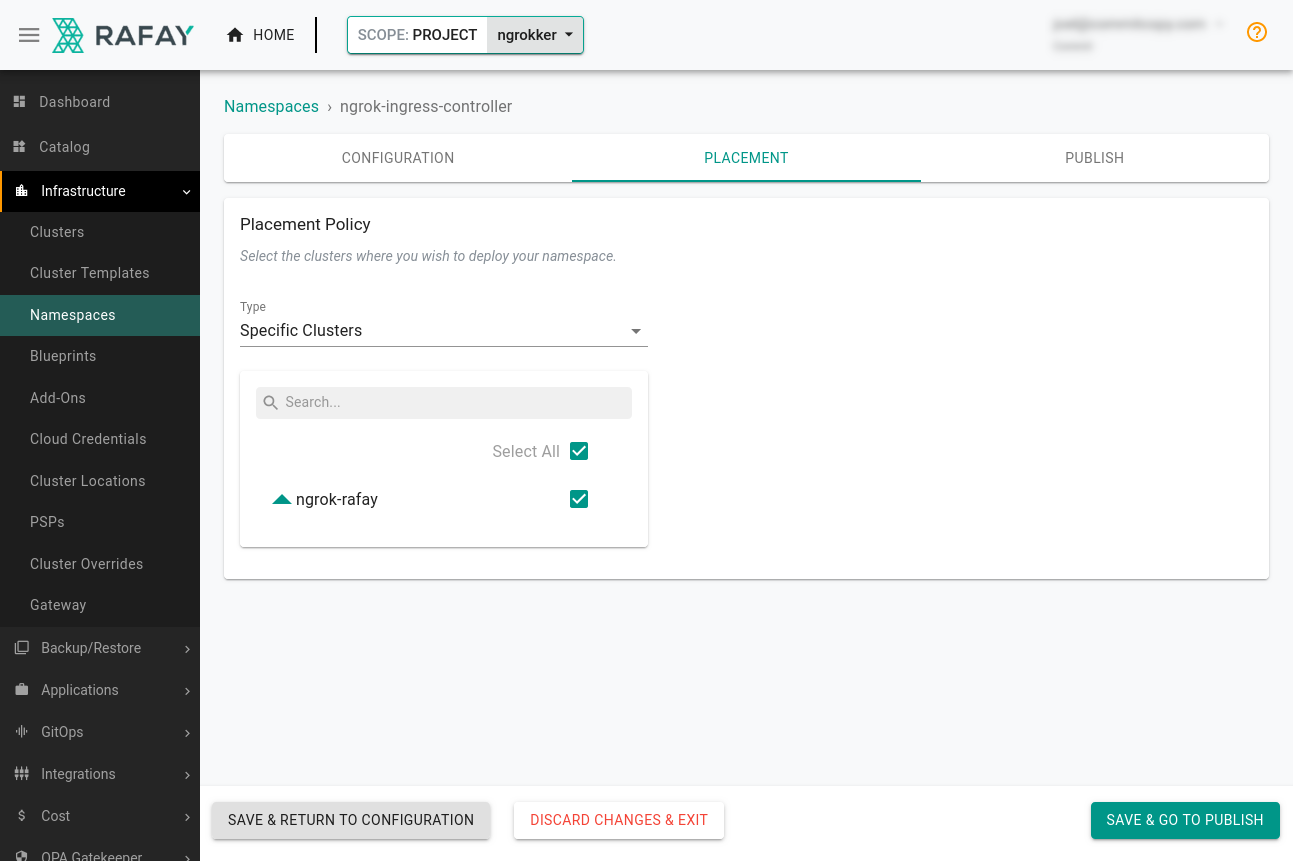
Place the new namespace on your cluster. Click the Placement tab, select the cluster, and click Save & Go To Publish→Publish.
-
Add a repository for the ngrok Kubernetes Operator to Rafay by clicking Integrations→Repositories. Give the repository a name like
ngrok-kubernetes-operator.In the Endpoints field, add the repository,
https://charts.ngrok.com, then click Save. -
Log in to the ngrok dashboard to get your ngrok Authtoken and create an API key.
-
Create a file on your local workstation named
ngrok-values.yamlwith the values below, replacing the defaults with your Authtoken and new API key.Loading…
-
While you're in the ngrok dashboard, create an ngrok static subdomain for ingress. Navigate to the Domains section of the ngrok dashboard and click Create Domain or New Domain. This static subdomain, which will look like
example.ngrok.app, will be yourNGROK_DOMAINfor the remainder of this guide.
Create and apply a blueprint for the ngrok Kubernetes Operator
Rafay uses blueprints to streamline cluster deployments and configuration of common services. They help your organization standardize an approach to security and reliability, with the option of customization based on your specific needs.
You'll create a custom blueprint for the ngrok Kubernetes Operator that you or others could then quickly apply to any number of clusters managed by Rafay.
-
Create a new Add-On by clicking Infrastructure→Add-Ons. Give it a name like
ngrok-k8s, then choose Helm 3 as the type. Choose to Pull files from repository, and Helm as the type.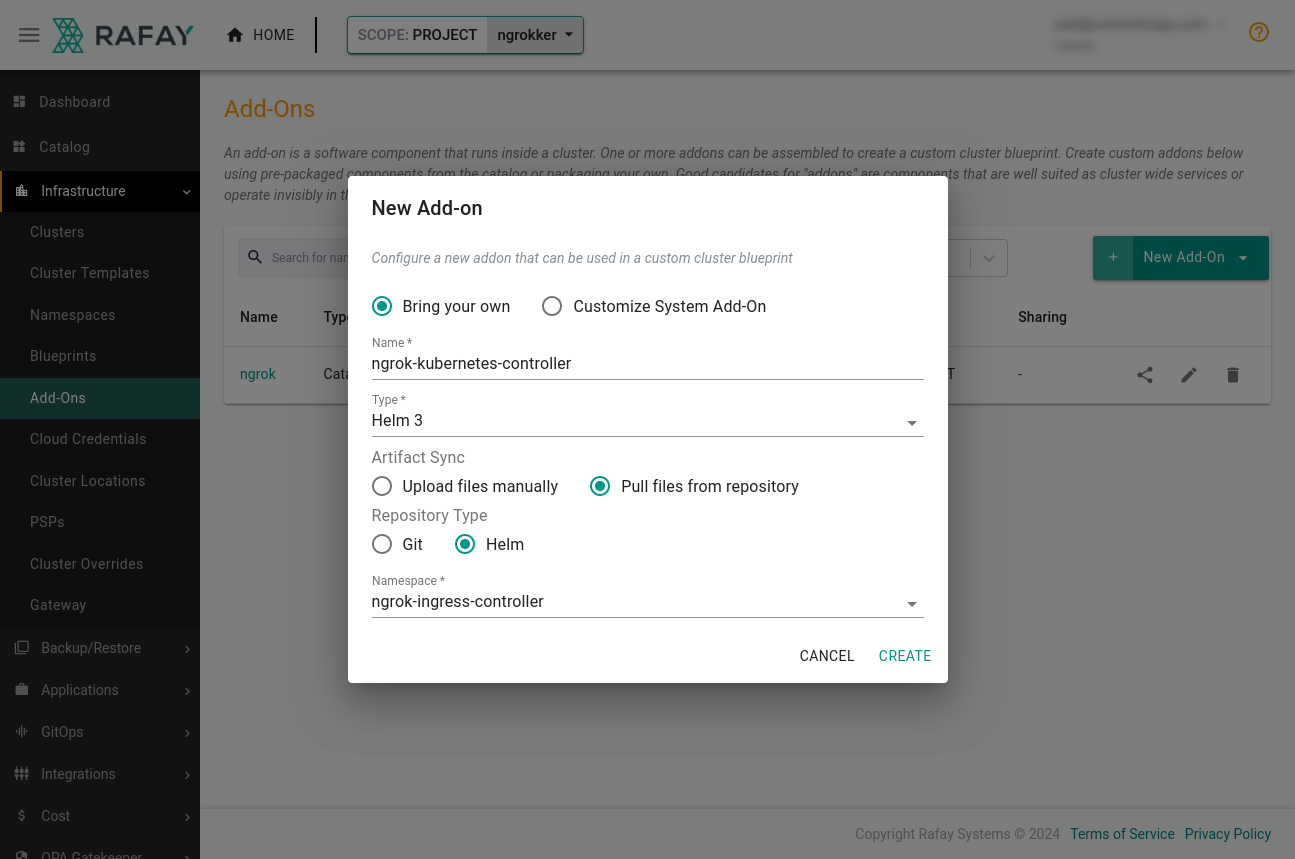
Click New Version, name it
v1, and choose the repository you created in the previous step. The Chart Name should bengrok-operatorand the Chart Version0.17.1(or a more recent version).Under the Values File(s) section, upload the
ngrok-values.yamlfile with your credentials.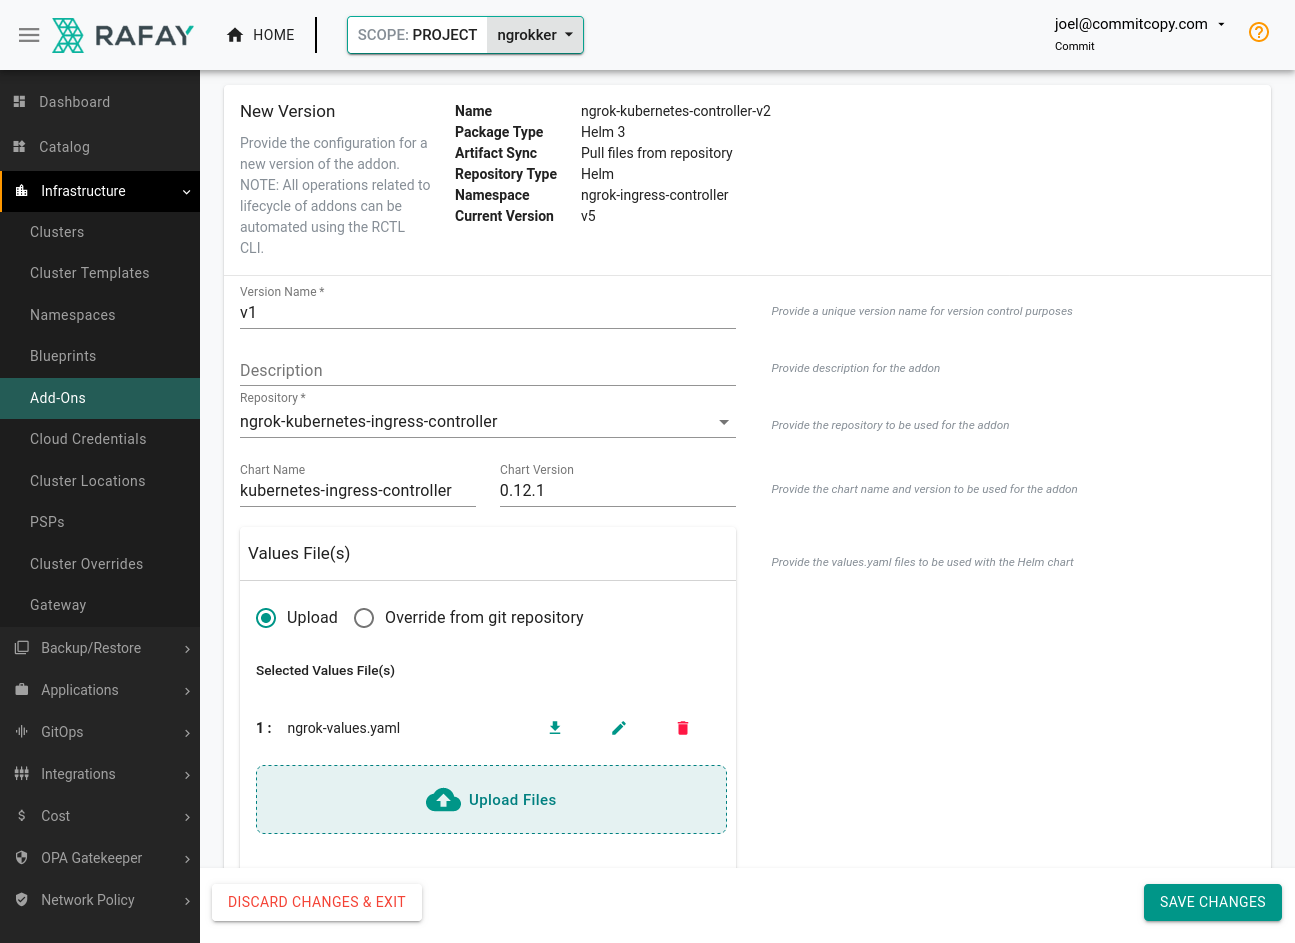
-
Head over to the Blueprints section of the Rafay dashboard and click New Blueprint. Name it
ngrok, and click Save. -
Give this blueprint a
v1version name, then choose theminimaloption from the Base Blueprint dropdown. Scroll down to the Add-Ons, section, where you can add thengrokAdd-On you just created.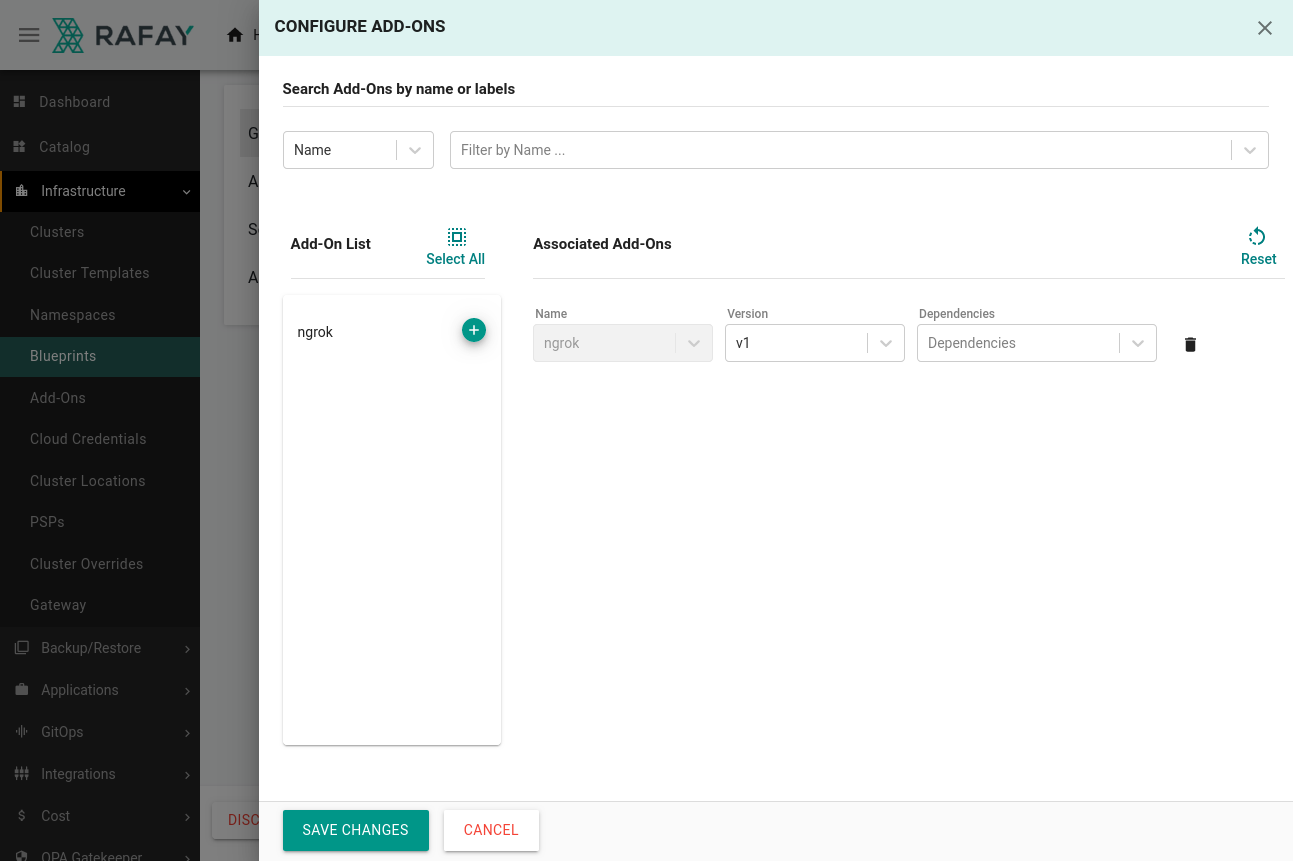
Save your changes.
-
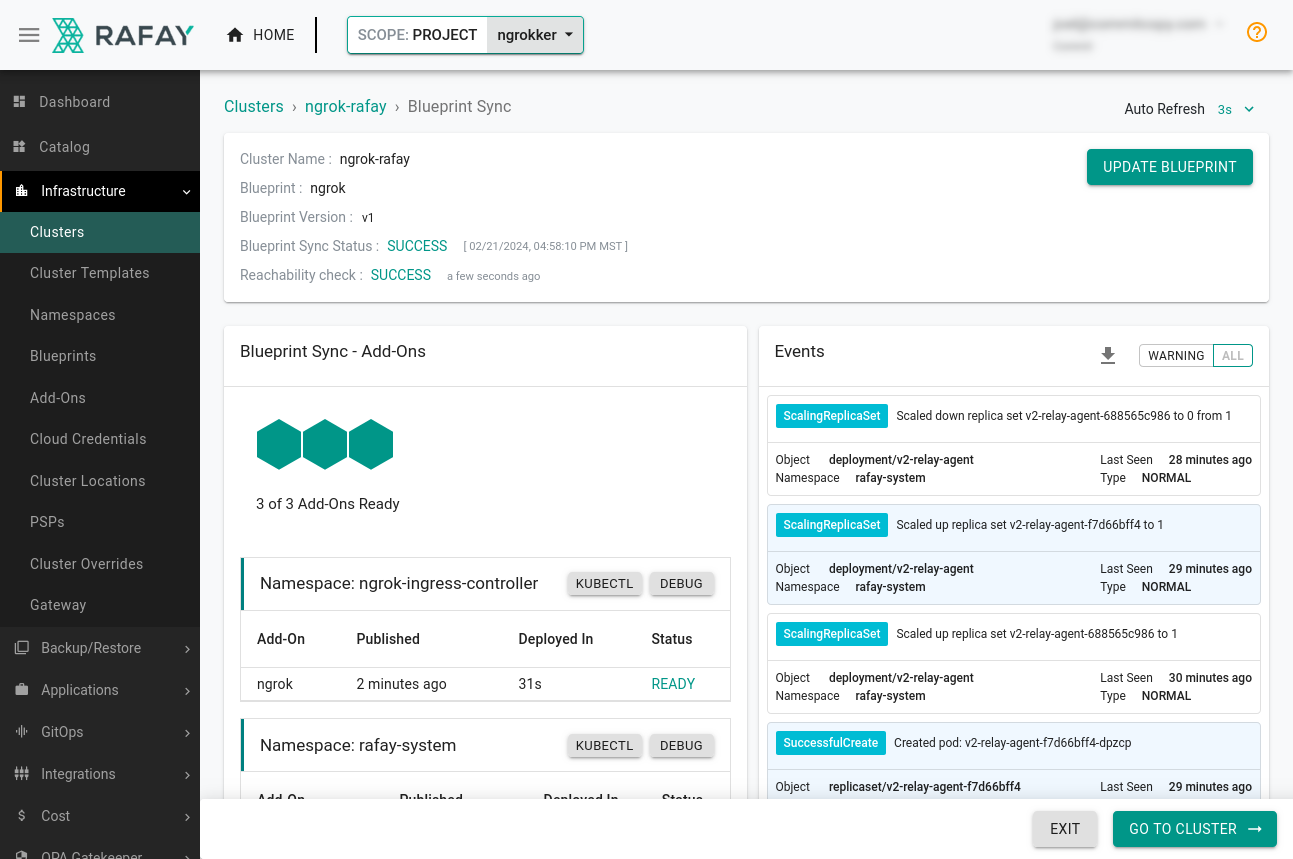
Click Infrastructure→Clusters, then the ⚙ icon associated with your cluster. Select Update Blueprint, and choose
v1of the ngrok blueprint.Rafay will then apply the blueprint to your existing cluster, deploying new resources, like the ngrok Kubernetes Operator, as necessary.
Deploy an app with Rafay
In Rafay, workloads operate like infrastructure blueprints, but for app deployments. By defining a workload, you or your peers can deploy standardized clusters and apps in multiple clouds and/or clusters.
You can deploy workloads directly from Rafay's catalog, but in this example, you'll create a custom workload using the AKS Store Demo, followed by an ingress configuration. Another option for creating workloads is Rafay's RCTL CLI tool.
-
Download the Kubernetes manifest for the AKS Store onto your local workstation.
Loading…
-
Add the following ingress configuration to the bottom of your
aks-store-workload.yamlfile. This configuration defines how the ngrok Kubernetes Operator will route traffic arriving on<NGROK_DOMAIN>to thestore-frontservice on port80as defined in the manifest.Loading…
-
Create a new workload from Applications→Workloads. Call your new workload
aks-storeand choose K8s YAML as the package type, ensuring you specifyngrok-ingress-controlleras the namespace. -
In the Upload Files area, upload the
aks-store-workload.yamlfile you created. Under Placement, pick your cluster and move ahead to publishing the workload. Give your cluster a few minutes to provision the new AKS Store resources and configure the ngrok Kubernetes Operator.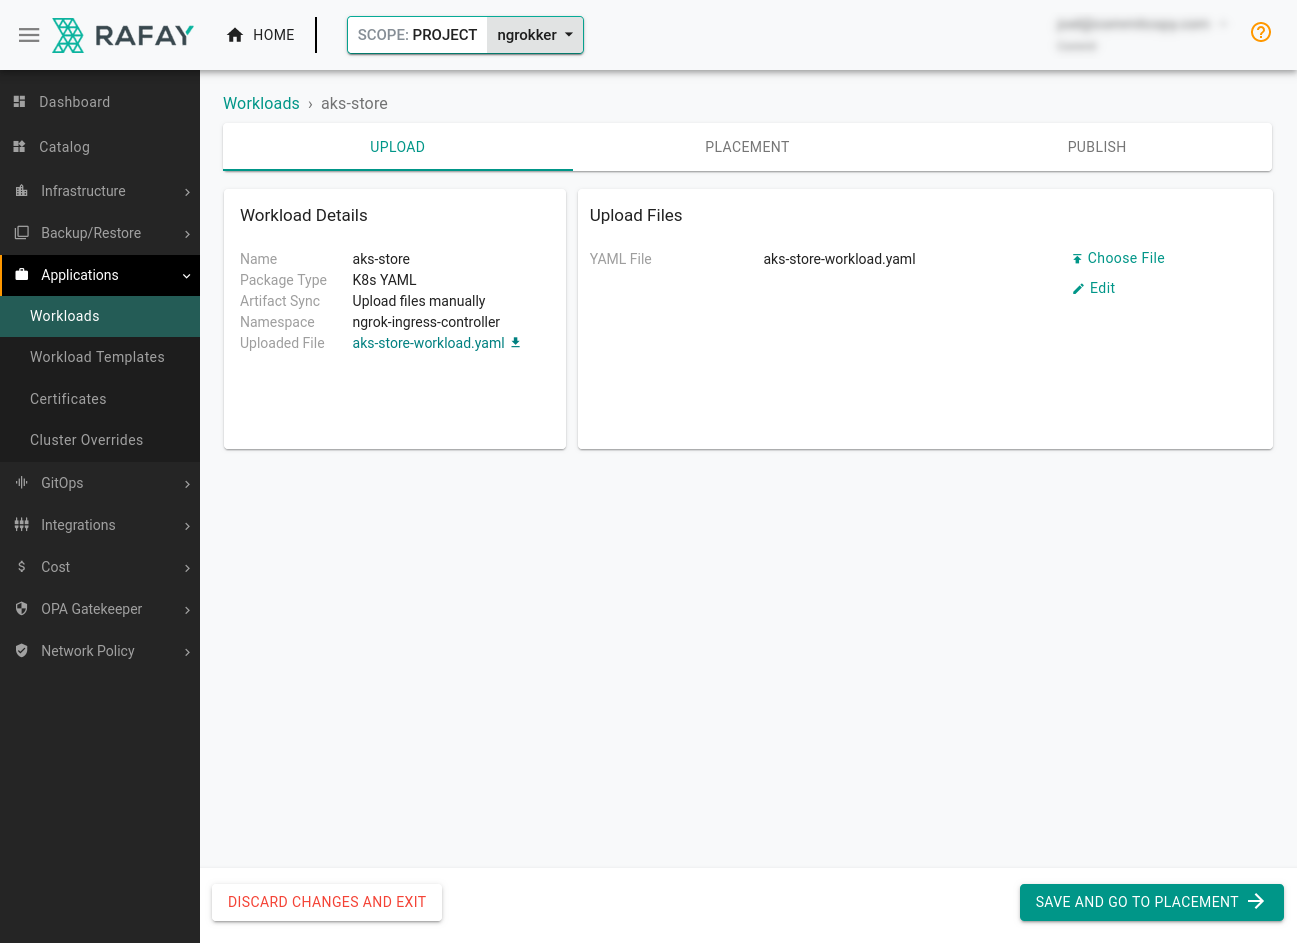
-
Navigate to your ngrok subdomain, e.g.
https://NGROK_DOMAIN, in your browser to see your example app as managed, deployed, and publicly networked via Rafay, Kubernetes, and ngrok!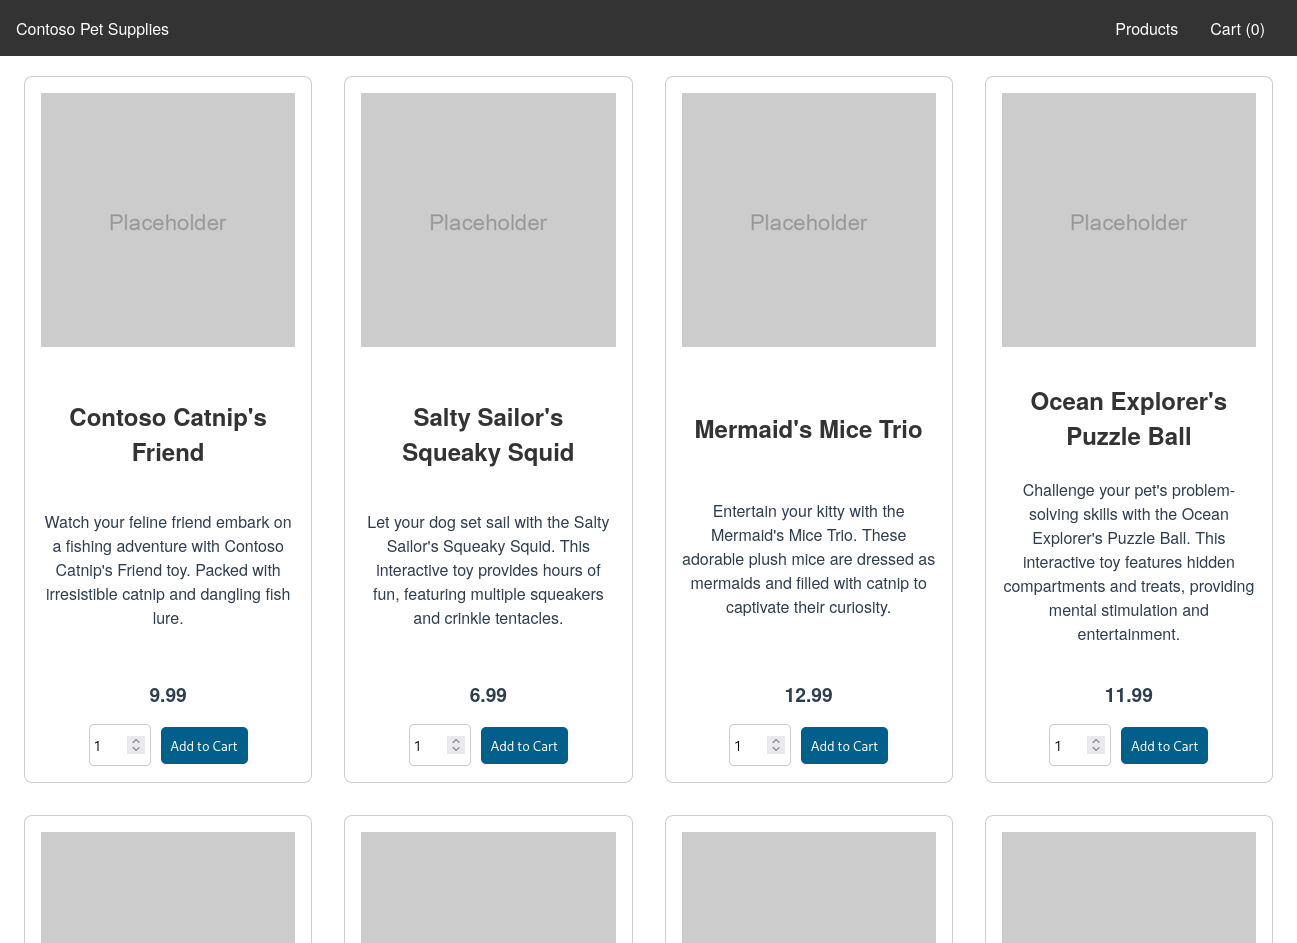
Behind the scenes, ngrok's cloud service routes requests into the ngrok Kubernetes Operator, which then passes it to the
store-frontservice.
What's next?
You've now used the open source ngrok Kubernetes Operator to add public ingress to a demo app on a cluster managed by Rafay. Because ngrok abstracts ingress and middleware execution to its cloud service, and you have saved your configuration to Rafay as a blueprint and workload, you can deploy and manage additional versions of this app in a few clicks.
As you extend your internal catalog of blueprints and networks, you can enable self-service for developers who want to deploy apps without sacrificing on control or efficiency.
Learn more about the ngrok Kubernetes Operator, or contribute to its ongoing development, by checking out the GitHub repository and the project-specific documentation.