Microsoft Entra ID SSO (SAML)
To secure access to ngrok Dashboard using Microsoft Entra ID Single Sign-On with SAML:
This article details how to configure Microsoft Entra ID as the primary Identity Provider for the ngrok Dashboard. By integrating Microsoft Entra ID SSO with ngrok, you can:
- Restrict access to the ngrok Dashboard only to users authenticated via Microsoft Entra ID
- Use Microsoft Entra ID's Dashboard to facilitate access to the ngrok app.
Requirements
To configure the ngrok Dashboard with Microsoft Entra ID, you must have:
- an ngrok account with administrative rights to modify the account settings
- an ngrok Account with access to configure SAML SSO.
Configuration Steps
To integrate ngrok with Microsoft Entra ID SSO, you will need to:
- Configure Microsoft Entra ID with the ngrok app
- Configure ngrok with the SSO settings provided by Microsoft Entra ID
Step 1: Configure Microsoft Entra ID
Create the ngrok App in Microsoft Entra ID
- Access your Microsoft Entra ID Dashboard as an administrator.
- Click Enterprise Applications.
- Click New application > Create your own application.
- Provide a name for the app (e.g. ngrok Dashboard) and choose the Non-gallery option and click Create.
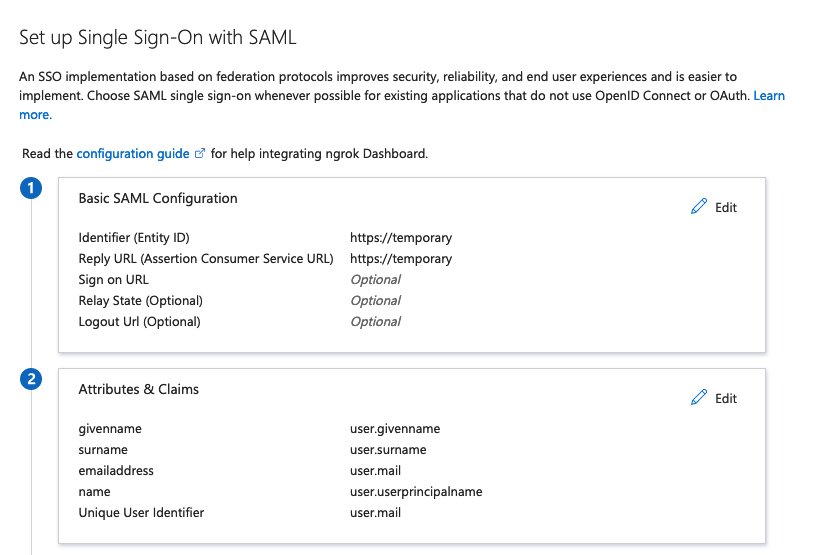
- Select Single sign-on, and then choose SAML.
- Enter in temporary values for "Identifier" and "Reply URL" and modify the value of "Unique User Identifier" to equal "user.mail".
- Identifier (Entity ID): https://temporary
- Reply URL (Assertion Consumer Service URL): https://temporary
- Unique User Identifier: user.mail
Note
This value can differ based upon setup, it is required that this user property value is an email address
Download the IdP metadata
- From within the Single sign-on section on the ngrok Dashboard app, click on the Download option for Federation Metadata XML. Download the metadata XML.
Grant access to users and groups
Microsoft Entra ID allows administrators to restrict access to SSO apps — such as the ngrok Dashboard — via assignments. By default, apps created in Microsoft Entra ID have no assignments — in other words, nobody can use Microsoft Entra ID SSO to access the ngrok Dashboard until you assign them to the app. To assign users and groups to the ngrok Dashboard app:
- Navigate to the User and groups from within the application.
- Use the Add user/group button to associate groups and users with the ngrok app. To test the SSO with ngrok, make sure you're assigned to the app.
Step 2: Configure ngrok
ngrok Dashboard SSO
To configure ngrok Dashboard SSO with Microsoft Entra ID:
- Go to the ngrok Dashboard.
- Click Settings > Account
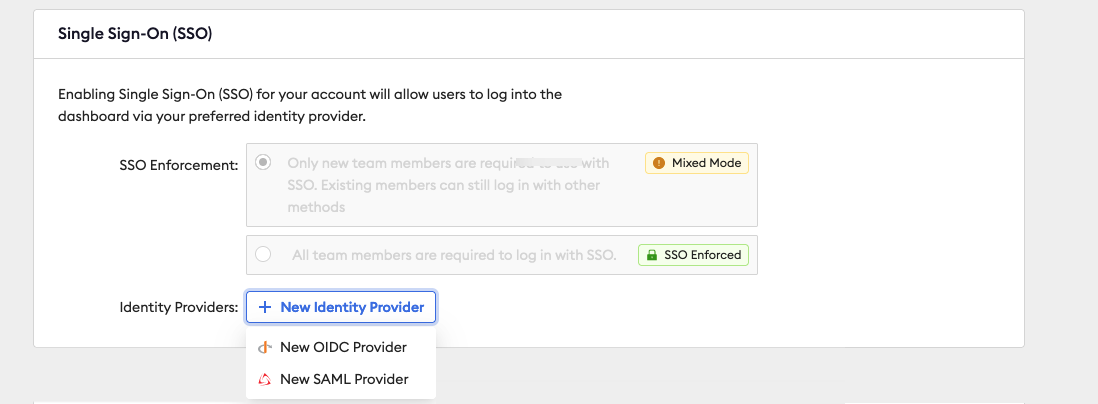
- Within the Single Sign-On (SSO) section, click New Identity Provider > New SAML Provider
- On the SAML Provider settings, provide a Description and click Upload XML
- Select your metadata file saved from the steps above and Save
- After you save, the SP Metadata will appear. Copy these values into the Microsoft Entra ID ngrok Dashboard app Single sign-on settings where temporary values were placed above:

- Save the changes in Microsoft Entra ID.
Step 3: Test the integration
- Navigate to the Microsoft Entra ID ngrok Dashboard app Single sign-on settings.
- Scroll to the bottom of the settings and click Test > Test sign in
- You should be redirected to the ngrok Dashboard.
- If the current user is not a member of the ngrok account and JIT is enabled, the user will be prompted to join.
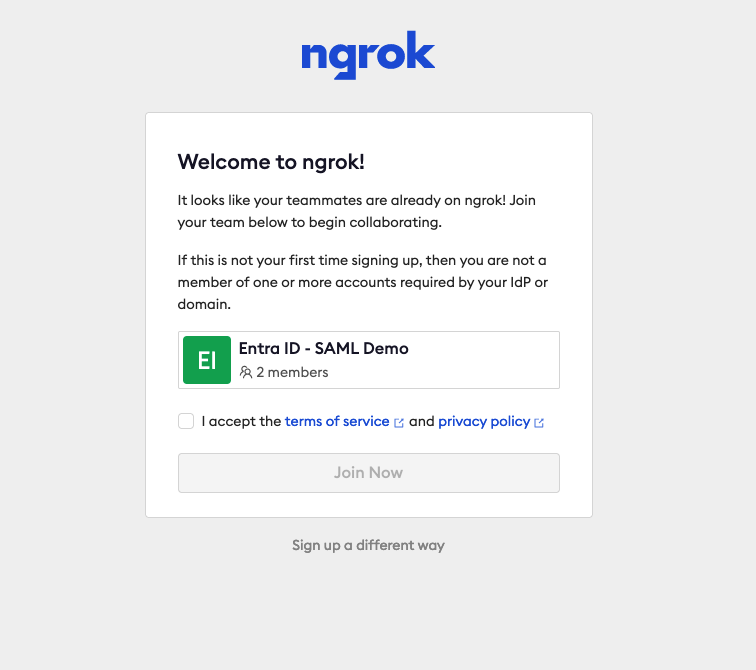
- If the current user is already a member, they will be successfully authenticated into the ngrok Dashboard.
- If the current user is not a member of the ngrok account and JIT is enabled, the user will be prompted to join.