Ingress to Kubernetes apps on clusters managed by DigitalOcean
Using this guide, you'll launch a new cluster on DigitalOcean and use the DigitalOcean Marketplace to provision the ngrok Kubernetes Operator to securely public traffic to a demo app.
In the end, you'll have learned enough to deploy your next production-ready Kubernetes app with Rafay, with the ngrok Kubernetes Operator giving you access to additional features, like observability and resiliency, with no extra configuration complexity.
Here is what you'll be building with:
- The ngrok Kubernetes Operator: ngrok's official controller for adding secure public ingress and middleware execution to your Kubernetes apps with ngrok's cloud service. With ngrok, you can manage and secure app traffic at every stage of the development lifecycle while benefiting from simpler configurations, security, and edge acceleration.
- DigitalOcean: DigitalOcean is a cloud service provider focused on developers, startups, and small-to-midsize businesses. With reliable monthly rates for less than hyperscalers like AWS, DigitalOcean's Kubernetes solution is a great fit for internal development teams building or scaling up new platforms without massive infrastructure build-out or expense.
What you'll need
- A DigitalOcean account.
- An ngrok account.
- kubectl and Helm 3.0.0+ installed on your local workstation.
- The ngrok Kubernetes Operator installed on your cluster.
- A reserved domain, which you can get in the ngrok
dashboard or with the ngrok
API.
- You can choose from an ngrok subdomain or bring your own custom branded
domain, like
https://api.example.com. - We'll refer to this domain as
<NGROK_DOMAIN>.
- You can choose from an ngrok subdomain or bring your own custom branded
domain, like
Provision a new cluster on DigitalOcean with doctl
In this guide, we'll stick with the CLI as much as possible to showcase how tightly the ngrok Kubernetes Operator can integrate with DigitalOcean and how you might automate these steps in the future.
-
With
doctlinstalled remotely, scope out the node sizes/specs, which will directly affect your monthly pricing, with the following:Loading…
-
Provision your cluster with the command below, replacing
NODE_SIZEandCLUSTER_NAMEwith your chosen size and a relevant name.Loading…
Loading…
-
Now you can install the ngrok Kubernetes Operator to provide ingress to our services.
Check out our Operator installation doc for details on how to use to install with your ngrok credentials.
Your new Kubernetes cluster, managed by DigitalOcean, is all set up—and with the ngrok Kubernetes Operator installed with a single option on the CLI.
Deploy an example app on your DigitalOcean-managed cluster
Let's explore how you can add apps or services to your DigitalOcean-managed Kubernetes cluster. DigitalOcean has a repository of sample Kubernetes apps, including the Bookinfo app, which we'll use.
-
Clone the repository to your local workstation and
cdinto the new directory:Loading…
-
Deploy the Bookinfo app to your cluster:
Loading…
You should see your cluster create a handful of new services, then verify everything is running correctly with
kubectl get all -n bookinfo.
Configure the ngrok Kubernetes Operator
Your Bookinfo app is running, but you have no means of accessing it from your local workstation—or anywhere else, for that matter. You could use kubectl port-forward..., but that's a fragile method of accessing your new app, and isn't appropriate for production use.
Instead, finish configuring the ngrok Kubernetes Operator to direct incoming requests directly to the container running the user-facing Bookinfo container. The Bookinfo docs recommend port-forwarding to the productpage service, which runs on port 9080—you can use that information to configure the ngrok Kubernetes Operator.
-
Create a new file called
bookinfo-ingress.yamlon your local workstation. This configuration defines how the ngrok Kubernetes Operator will route traffic arriving onNGROK_DOMAINto thestore-frontservice on port80as defined in the manifest.tipMake sure you edit line
10of the YAML below, which contains theNGROK_DOMAINvariable, with the ngrok domain you created earlier.Loading…
-
Apply the new configuration to your cluster:
Loading…
tipNote: If you get an error when applying the manifest, double check that you've updated the
<NGROK_DOMAIN>value and try again. -
Navigate to
https://<NGROK_DOMAIN>in your browser to see your example Bookinfo app as managed, deployed, and publicly networked via DigitalOcean, Kubernetes, and ngrok! Click Normal user to see a little more—it's not much to look at, but it's a working Kubernetes app with functional, secure, and simple ingress with the ngrok Kubernetes Operator.
Enable extra features of ngrok's cloud service
To demonstrate how ingress configuration and OAuth support work, you can quickly launch an open-source observability stack including Prometheus, Grafana, and Alertmanager on your cluster.
-
Head over to the Kubernetes Clusters dashboard on the DigitalOcean console and click on the cluster you created previously.
-
Click the Marketplace tab, find or search for Kubernetes Monitoring Stack, and click Install. Confirm your choice.
In the background, DigitalOcean uses Helm to create a new integrated deployment for Prometheus, Grafana, and Alertmanager.
-
Create a new domain in the ngrok dashboard at
monitoring.<NGROK_DOMAIN>. -
Edit your
ngrok_ingress.yamlfile you created in the previous step to include the highlighted configuration at the bottom, which will route all traffic arriving onhttps://monitoring.NGROK_DOMAIN/to thekube-prometheus-stack-prometheusservice running on port9090in your cluster.Loading…
-
Visit a URL like
https://monitoring.NGROK_DOMAIN/alertsto see data from Alertmanager: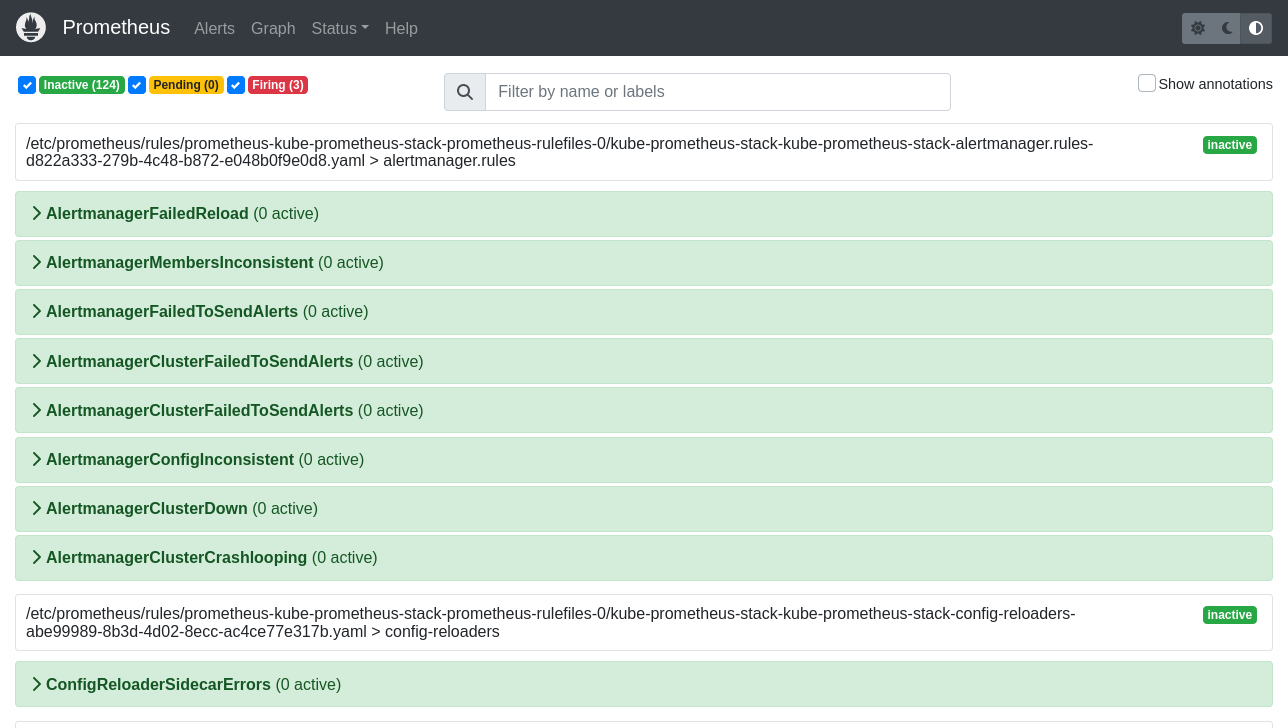
Having comprehensive observability for your Kubernetes app is paramount, but so is security—you don't want just anyone snooping around your metrics and alerts.
-
Edit your
ngrok_ingress.yamlfile once again to add OAuth, leaving the previous configurations untouched. Note the newannotationsfield and theNgrokTrafficPolicyCR.Loading…
-
Re-apply your
2048.yamlconfiguration.Loading…
-
When you open your demo app again, you'll be asked to log in via Google. That's a start, but what if you want to authenticate only yourself or colleagues?
-
You can use expressions and CEL interpolation to filter out and reject OAuth logins that don't contain
example.com. Update theNgrokTrafficPolicyportion of your manifest after changingexample.comto your domain.Loading…
-
Check out your deployed 2048 app once again. If you log in with an email that doesn't match your domain, ngrok rejects your request. Authentication... done!
What's next?
You've now used the open-source ngrok Kubernetes Operator to add public ingress to an example app on a Kubernetes cluster managed by DigitalOcean. Because ngrok abstracts ingress and middleware execution to its cloud service, and thanks to DigitalOcean's doctl tool, you can quickly deploy new clusters, apps, and helpful services without leaving your CLI.
Learn more about the ngrok Kubernetes Operator, or contribute to its ongoing development, by checking out the GitHub repository. We also have an extensive explainer for how the Operator works, plus additional documentation, which also includes details on leveraging the new Kubernetes Gateway API.