When you need to explain this setup to customers who install and run the ngrok agent in their network, you can share our end-customer guide which covers why ngrok is used, how it works, and why it’s secure.
Example scenario
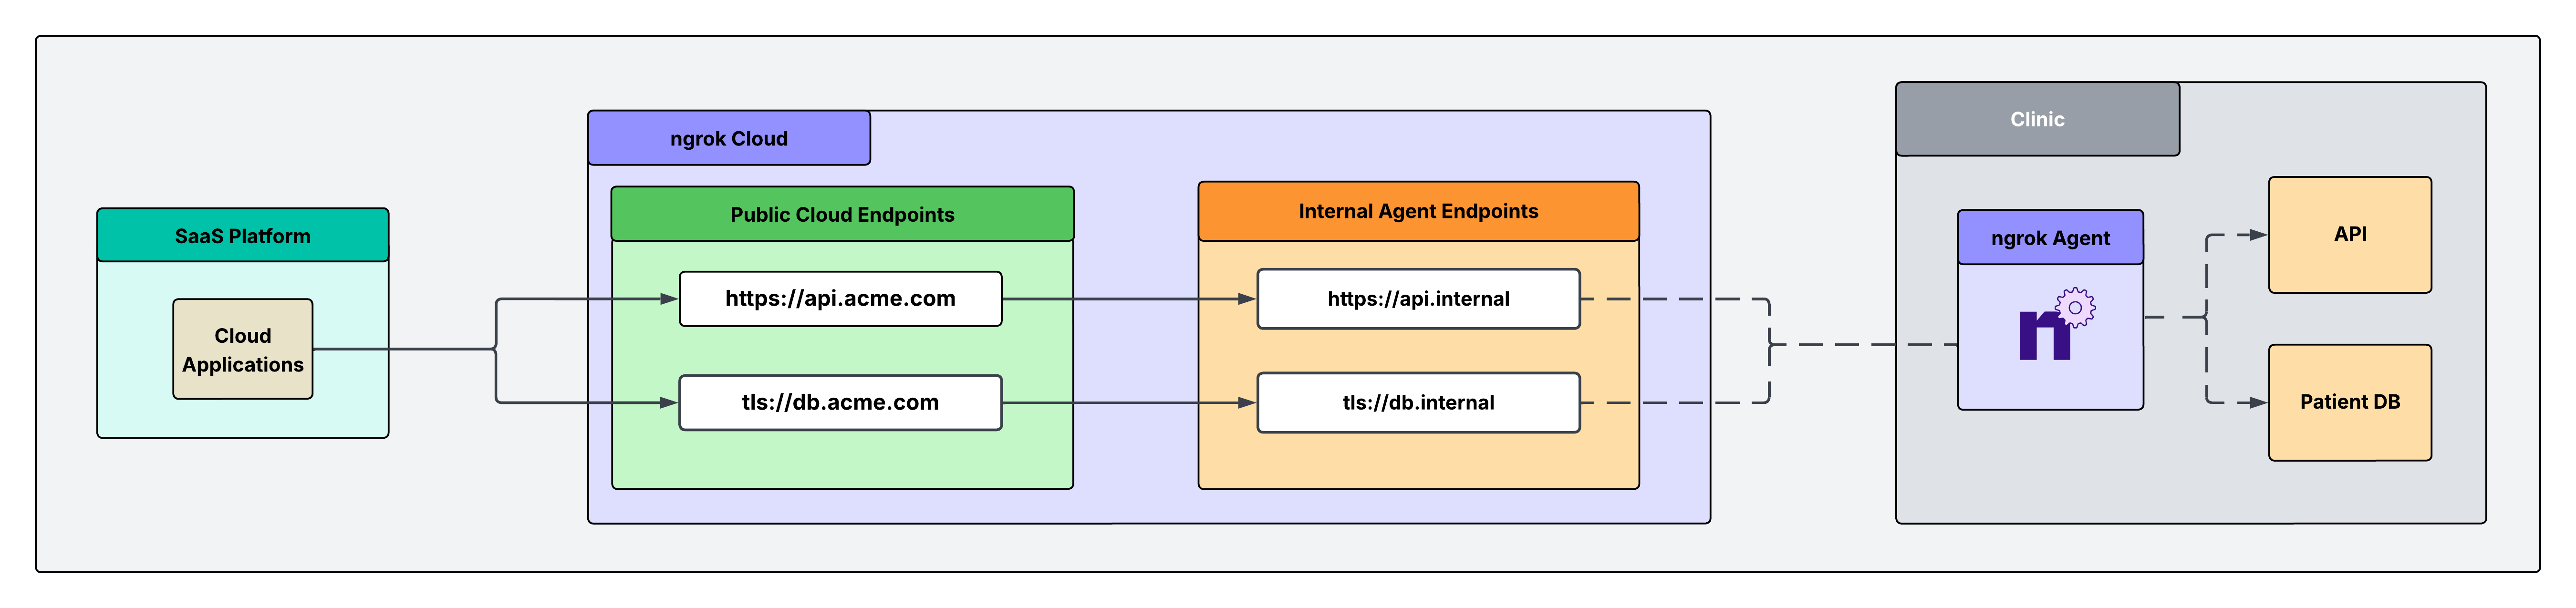
Consider a situation where your company (Acme Corp.) needs direct access to resources running in your customer’s private network. This network is a clinic that runs a third party API and a DB containing sensitive patient information. In this scenario, this clinic blocks inbound connections. However, your SaaS applications need to reach that API to make requests and fetch data from that DB for mission critical operations. Specifically, the patient DB needs to be e2e TLS encrypted, with mTLS terminating in the customer’s network.Architectural reference
Why only one ngrok Agent per network?
Traditionally, you might assume that every server inside the network needs its own ngrok agent, but this isn’t necessary. A single ngrok agent is installed on a network-accessible machine inside the network. The agent acts as a central gateway (jumpbox) that can reach any machine on the local network, eliminating the need for multiple agents.Tutorial
What you’ll need
- An ngrok account. If you don’t have one, sign up.
- An ngrok agent configured in a remote network. See the Agent CLI Quickstart for instructions on how to install the ngrok agent.
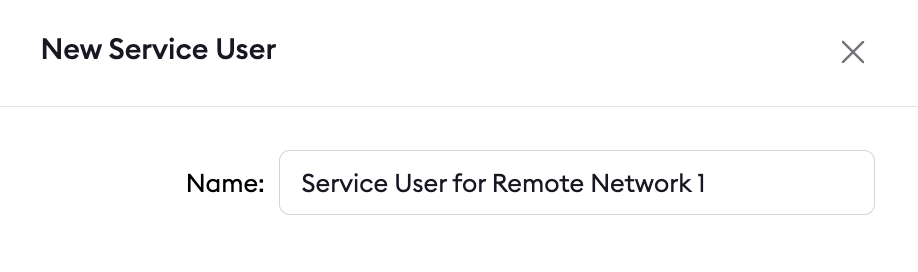
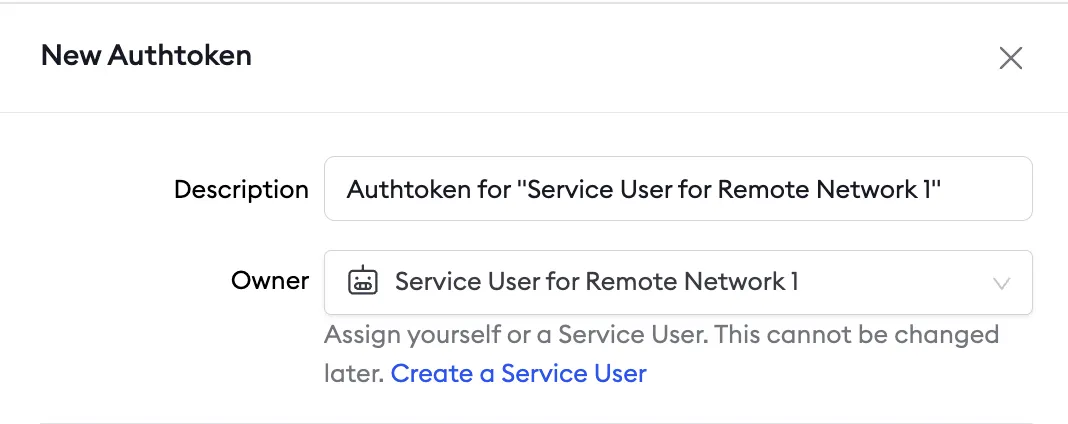
1. Create a Service User and authtoken for isolated network access
First, you’ll create a service user and an associated authtoken for each of your customers. A Service User is intended for automated systems that programmatically interact with your ngrok account (other platforms sometimes call this concept a Service Account). Create a separate Service User + associated authtoken for each of your customers so that:- Their usage of your ngrok account is isolated and scoped with a specific permission set
- If a customer is compromised you can revoke their access independently
- Agent start/stop audit events are properly attributed to each customer
- Your ngrok agents don’t stop working if the human user who set them up leaves your ngrok account.
2. Install ngrok and configure Internal Endpoints
Configure the agent to create internal Agent Endpoints that point to the services you want to remotely access. This will connect the services to your ngrok account but nothing will be able to connect to them until completing the subsequent steps. The configuration to achieve this is shown below in the example agent configuration file. Internal Endpoints are private endpoints that only receive traffic when forwarded through the forward-internal Traffic Policy action. This allows you to route traffic to an application through ngrok without making it publicly addressable. Internal endpoint URL hostnames must end with.internal.
After installing the ngrok agent, define internal endpoints for each service you want to remotely access inside the ngrok configuration file. Additionally, here is where you’ll configure the agent to terminate mTLS for the patient DB endpoint. You can install ngrok and its configuration file in /path/to/ngrok/ngrok.yml and the executable in /path/to/ngrok/ngrok.
3. Create your Cloud Endpoints and attach a Traffic Policy
Cloud Endpoints are persistent, always-on endpoints whose creation, deletion, and configuration is managed centrally via the Dashboard or API. They exist permanently until they are explicitly deleted. Cloud Endpoints do not forward their traffic to an agent by default and instead only use their attached Traffic Policy to handle connections. Create a public Cloud Endpoint in the ngrok dashboard by navigating to endpoints and clicking new as shown in the screenshot below: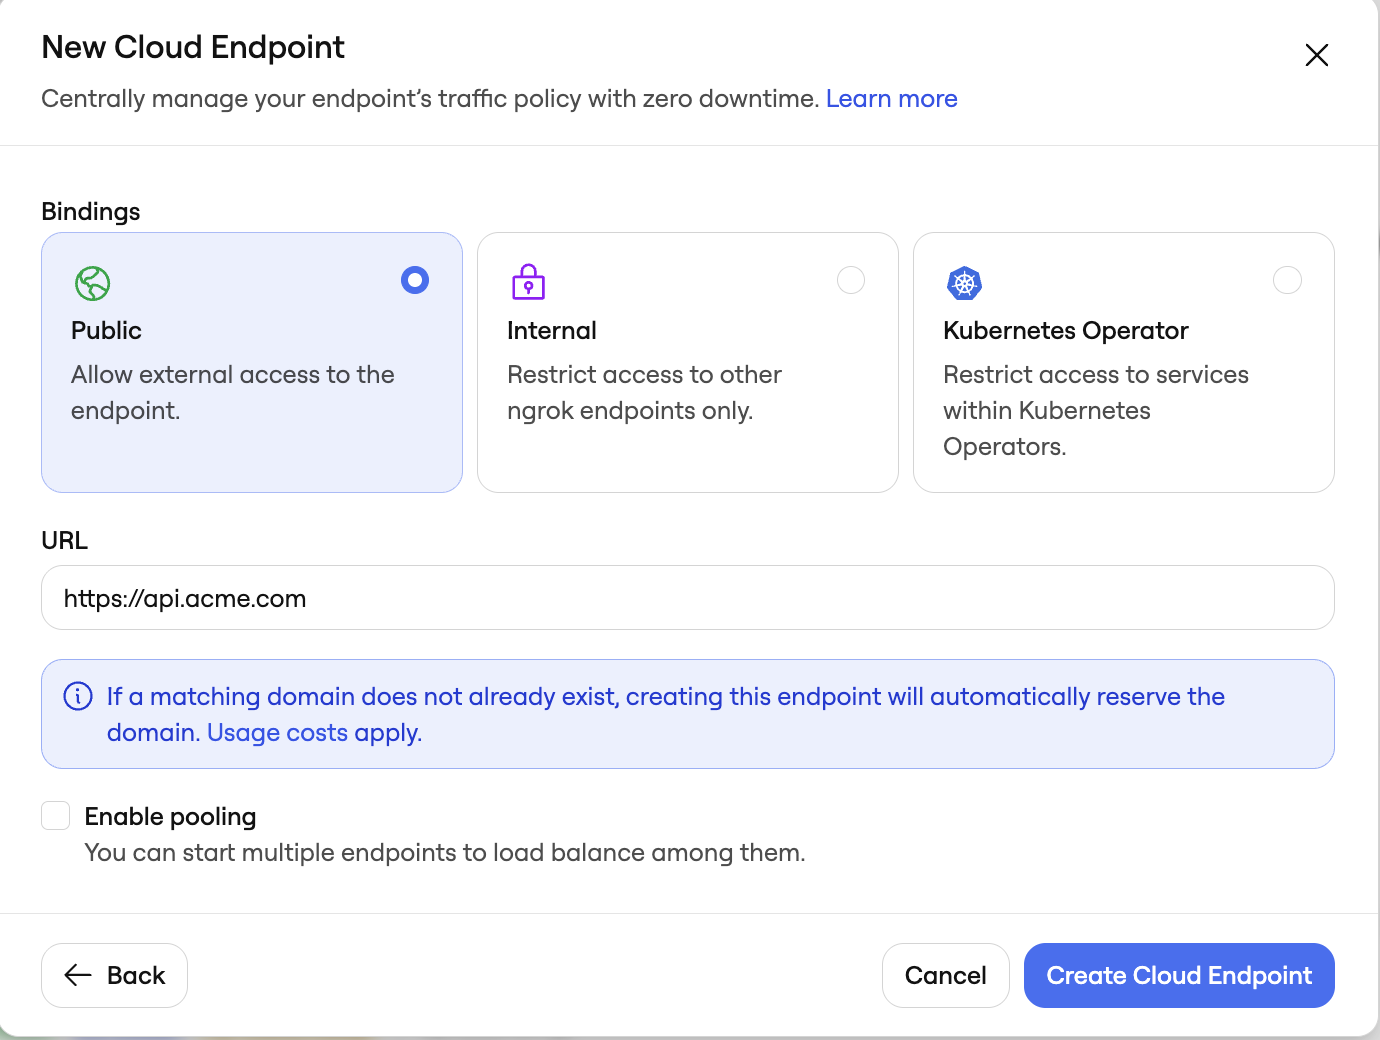
tls://db.acme.com.
Click on your newly created API Cloud Endpoint and replace the default Traffic Policy with:
4. Secure your API Cloud Endpoint with IP restrictions
Navigate to your newly created Cloud Endpoints in the endpoints tab on your ngrok dashboard, and apply a Traffic Policy action to each. For this example, you can apply IP restrictions to your API endpoint. Browse through the full list of Traffic Policy actions listed here. You can add this action directly to the Cloud Endpoint’s YAML configuration. The final Traffic Policy config for each endpoint can be seen below: https://api.acme.comWhat’s next
- Share the end-customer guide with customers who need to understand why ngrok is in their network.
- Set up a custom connect URL to white-label the agent connection for your customers.
- Install ngrok as a background service to ensure the agent starts on boot and recovers from failures.
- Eliminate single points of failure with redundant agents to achieve high availability.